Yesterday I made a card inspired by one on Pinterest and I discovered some easier ways to make it.
(This
post
contains
affiliate
links.
When
you
shop
through
my
links
{most
are
at
the
end
of
my
post}
I
may
receive
a
small
commission
at
NO
cost
to
you!
Thanks
for
your
support!)
I made this first card on my FB Wednesday Live video yesterday and found some great tips afterward! Oh my!
I kinda followed the directions on the card I seen. This card base is 5 1/2" wide by 11" long. Ok, that's big. It worked but my directions on the video about the layers was the hard way.
I used a couple different stamp sets for this focal point. The circular set is by Simon Says Stamp. I've had this for a while. But I love the kitty with the ice cream and I got it at Scrapbook.com. It's made by Colorado Craft Company and it's called Ice Cream Day. Isn't it cute!
This is the inside. The cones & first sentiment is part of the Ice Cream Day and the Happy Birthday is from the SSS set.
Now, I have a picture tutorial of the way better than what I showed on my video. I started with a standard A2 card base, 5 1/2" x 8 1/2" folded.
This cut is the same. I found center front bottom and cut from it to each folded corner. From here I changed how I did the layers.
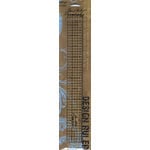
Now, my customers know I like itty bitty edges on my layers so you may want to skip this set. I cut my pink 4 1/8" x 5 3/8" and cut it like I did the card cover. I found the center front of the pink with my centering ruler then cut from there to each corner. Check to fit! I slightly had to trim a side to fit.
I cut a piece of print paper 4' x 5 1/4" and cut it like my pink layer. Again I recommend checking the fit and trimming if needed. This was SOOO much easier!
Now I adhered my layers. This is the same as on my video yesterday. Just make sure the angled sides of the 2 triangles line up with the angled sides of the cover. Also make sure your pieces stay inside of the sides of the card. Is that clear?
And here's my completed card. And it doesn't take an oversized envelope! Yay! The sentiment is from Spellbinders (Fun Stampers Journey) stamp set called Birthday Candles and its coordinating die set.
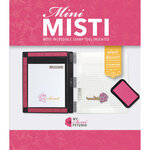
I stamped my sentiment with my pink ink (thank goodness for a MISTI!), cleaned my stamp then stamped with Clear ink and clear embossed. It turned out pretty good! A couple gems and all I have left to do is stamp the inside.
I made both my cards with a birthday theme as we have lots of birthdays the next couple of months. Now I'm ready!
Stampin Carol
If any of you lack wisdom, let him ask of God, who gives to all
liberally.... and it will be given to him. James 1:4


1 comment:
I really love this card! Wow it’s so stunningly beautiful!
Post a Comment