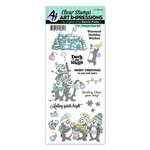
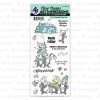
This card is so cool that I made a video yesterday on how to make it! Its inside is pretty cool! I used a variety of products but mainly Art Impressions' Penguin Cheer clear stamp set.
(This post contains affiliate links. When you shop through my links {most are at the end of this post}I may receive a commission at NO cost to you! Thanks so much for your support!)
I will give you the basics here but you should watch my video (click on my YouTube link in the sidebar... scroll down a bit).
You start with your card base of 5 1/2" x 10" (make sure it's 10"). Score
this at 2 1/2" and 7 1/2". You are making a gate fold card.
Next is the inside. Cut your card stock at 5" x 10". Score at 1
1/4", 2 1/2", and 3 3/4", flip and score again the same
measurements. By flipping and starting again at the other end your
measurements seems to work out better. The template below shows the score
lines as you also score diagonally between the 3 sets of score lines on each
end. You also cut off the corners by marking the ends at 2 1/2" and cutting
from the outside score lines to the center.... Clear as mud?

Now, when you fold this the vertical lines are folded valley and the diagonal are folded mountain.

I tried to photo this to show the folds as best I could. Click on the photo and you can see it enlarged. I think folding this piece is the most difficult part of the card.
Now to adhere the inside folded piece to the inside of your card base...

It is difficult to really explain this but I'll try. You only adhere 3 parts of the fold to the base. It's easier to lay both pieces out flat first. Add adhesive to the center panel and line up the middle of the 3 score lines with the folds of the base on each end. Make sure they're lined up! Then add adhesive to the end pieces and adhere making sure the points touch the edges of the card base.
At this point you can start decorating! I covered the front 2 panels, the
inside panel, added some penguins, a sentiment, and a belly band to hold it
closed!

Here is the cover with the belly band and the stamp set I used.

This is a close up of the belly band image. I think I'll add some Wink of Stella to it. The word merry is from Spellbinders stamp set Whimsy Trees. I cut the sentiment apart just to get 1 word!

Isn't this just tooooo cool!!! I added the little penguin on the right and all the snowflakes after I finished my video (now on YouTube dated yesterday).

I angled this photo so you could see the folds better.
I really recommend you watch the video for some tips that I didn't give here. But I have to say when you do be aware that my internet is horrible and my words, mouth, and visual directions don't sync.
Stampin Carol
He who has a generous eye will be blessed, for he gives of his bread to the
poor. Proverbs 22:9
- Art Impressions - Christmas - Clear Photopolymer Stamps - Penguin Cheer
- Price: $14.38
- Sku:aim-5192
- 5192 - Penguin Cheer Set
- Price: $18.40
- Sku:5192
- Spellbinders - Etched Dies - Essential Circles

- Price: $20.22
- Sku:spe-s4-1039
- Fun Stampers Journey - Christmas - Clear Photopolymer Stamps - Holiday Sentiment Stacks

- Price: $9.05
- Sku:spe-ss-0705
- Spellbinders - Embossing Folder - Slimline - Diagonal Stripes

- Price: $6.15
- Sku:spe-ses-024
- LDRS Creative - Stampendable Stamping Tool

- Price: $7.19
- Sku:ldrs-1040
- New MISTI Stamping Tool - The Most Incredible Stamp Tool Invented
- Price: $59.99
- Sku:msp-64124
- Memento Full-Size Ink Pad - Tuxedo Black

- Price: $5.99
- Sku:ME-000-900
- Journey Craft Glue

- Price: $4.95
- Sku:AD-0111
- Fun Stampers Journey - Adhesives - Journey Craft Glue

- Price: $4.45
- Sku:spe-ad-0111
- Scotch Adhesive Refill for Pink ATG Applicator Gun Gen Purpose 1/4" Tape 2 Rolls

- Price: $6.86
- Sku:pp-cat085-r
- Scor-Tape - 1/2 inch wide

- Price: $7.50
- Sku:scor12
- Scrapbook.com - Clear Double Sided Adhesive Roll - 1/4 Inch x 81 Feet - Permanent - 1 Roll
- Price: $1.99
- Sku:uc-adh-1005
- Details Pro Shears

- Price: $13.95
- Sku:TO-0063
- Fun Stampers Journey - Tools - Details Pro Shears Scissors

- Price: $12.54
- Sku:spe-to-0063
- Fiskars - 9 inch Bypass Paper Trimmer

- Price: $22.42
- Sku:f-9913
- We R Memory Keepers - Trim and Score Board
- Price: $33.26
- Sku:ac-660071
- Spellbinders - Platinum - Die Cutting and Embossing Machine
- Price: $139.99
- Sku:spe-pl-001
- Spellbinders - Platinum 6 - Die Cutting and Embossing Machine

- Price: $79.99
- Sku:spe-pe-100