I made another card using Spellbinders April Large Die of the Month and
Clear Stamp of the Month set. This one is a slimline. Right now these are
available by subscription only but if there are any still available they
will be purchasable after May 10. There is more info on my Specials & More page about the monthly kits.
(This
post
contains
affiliate
links.
When
you
shop
through
my
links
{most
are
at
the
end
of
my
post}
I
may
receive
a
small
commission
at
NO
cost
to
you!
Thanks
for
your
support!)
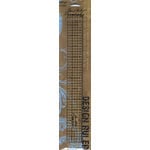
There are many options using the Large Die set, Universal Curved Border Set, as there are 4 different curved borders and 7 floral dies.

This floral border is pretty cool. Though some of the floral dies didn't fit the border I used the border die and cut what I wanted to cover. I thought it turned out pretty good.

I used all Fun Stampers Journey card stocks from my stash. These border dies barely fit through my Platinum 6. Depending on the size of card stock you want to use you may need to use a full size die cut machine like the big Platinum.

I used my Bearly Art Glue to adhere all these colorful bits and pieces. The little red dots in the yellow flowers are from a pack by Stampendous that I purchased about 10 years ago. I still have a bunch!
This card has already been mailed as our daughter has a birthday
celebration next week! We have 6 birthdays to celebrate next month! I need
to get cracking getting more cards made!
Stampin Carol
Shout with joy to the LORD, all the earth! Worship the LORD with gladness.
Come before Him, singing with joy. Psalm 100: 1-2
- Tsukineko - Memento - Fade Resistant Dye Ink Pad - Tuxedo Black
- Price: $6.26
- Sku:gb-tsmp900
- Scotch ATG - Adhesive Applicator Gun - Pink - Uses One Fourth Inch Adhesive
- Price: $30.20
- Sku:jv-cat085
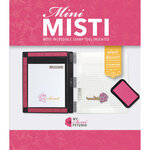
- Memory MISTI 12 x 12 - Most Incredible Stamp Tool Invented

- Price: $99.99
- Sku:msp-64679
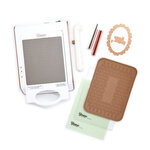
- Scrapbook.com - Magic Mat - Standard - Cutting Pad for *Select Machines - 6.125 x 8.75

- Price: $9.99
- Sku:sbc-mmat-1
- Spellbinders - Platinum 6 - Tool N One Bundle

- Price: $89.99
- Sku:spe-bundle-pto
- Spellbinders - Platinum - Die Cutting and Embossing Machine
- Price: $139.99
- Sku:spe-pl-001