Monday, September 29, 2014

Trees and Snowflakes

When I posted a picture of my desk last Wednesday for the world-wide blog tour of desks I was busy working on a card.  I even posted the link to the card that so inspired me.  Well, the card is done and I have to admit, there is virtually no resemblance except for a punched out tree.


I used a bunch of scraps from previous projects.  The stamped phrase is  from a stamp set called "O Christmas Tree" by Red Rubber Designs.  I used 2 different die sets from Spellbinders,  Labels 28 and Nested Pine Trees.  And I used the Cuttlebug embossing folder "Snowflakes."


Here's a closer look at the trees.  I thought it turned out cool that the tree in the pattern paper fit so nicely in the littlest tree die!  The banner was all hand cut.  I think I like this card but am wondering if it's a bit "busy". What are your thoughts?

Friday, September 26, 2014

A Very Merry Christmas Reindeer

Today I decided to make a card to answer 2 challenges.  One is by Red Rubber Inspirations (#139) and the other by Freshly Made Sketches (#155).   The challenge by R. R. I. is to stay focused on stamping and the one by Freshly Made Sketches is, of course, a sketch!


I stamped 3 different things on this card: the reindeer face from the set "Christmas Fun" by Red Rubber Designs, the reindeer strip using an old set called "Ornament Backgrounds" by the closed The Angel Co., and the text, name unknown, also by TAC.


I colored the reindeer with Copic markers and added a bit of bling using my Clear Wink of Stella brush to his nose and mouth.  And I added dots from my Black Stardust Gel pen to the eyes.  The tag was made using an old Sizzix die (the big red ones) called Scalloped Tags.   I used my Bow Easy for the bow.

Please now pop over to Red Rubber Inspirations and Freshly Made Sketches to see all the great projects!

Wednesday, September 24, 2014

My Desk and a Cracker

It's Wednesday!  I get to stay home today! Hopefully I'll get some time to play at my desk.  And yes, you get to see what's happening on my desk as today is WOYWW, aka What's On Your Workdesk Wednesday.  If you're new to this check out Julia's blog, the Stamping Ground.  She's the head desker and starter this fun weekly blog tour over 5 years ago!  I've know blogs that haven't lasted that long!  Anyway, here's my desk today.


So what's going on here?  Well, I'm playing with some Spellbinder dies to make a Christmas card.  I seen an interesting card on Pinterest and I clicked through to the blog. This work is the beginning of my card.  You'll have to come back to see the end result. I have to admit it looks nothing like the inspiring card!

Now for the cracker.  Bet that threw you a bit.  I recently purchased the "Artiste" Cricut cartridge when I was in a hostess group for a friend in CTMH.  I also got the "Art Philosophy" cartridge.  I wanted to play with my Cricut more and decided to try a 3D project.  I've been told this shape is called a cracker.  I should have done a bit of research on it to learn more.


This was fun!  I can just imagine jewelry, candy, or even a gift card in this.  Just need to untie one of the ribbons and the box opens easily.


I cut out a snowman head from some of the scrap (I used almost all of the 12" square paper for this) and cut the labels using the same cartridge.  The stamped image is from my stash.  I used Wink of Stella on the eyes and nose of the snowman for a bit of bling.

I hope you enjoyed my post today.  Please pop on over to the Stamping Ground for the opportunity to view many more desks from all over and get inspired from projects of all kinds.  Thanks for coming by!

Monday, September 22, 2014

Monkeys on a Unicycle and a Lion

I bet you are intrigued by my post title.  But, it is about the remaining 2 of the 3 card samples I made for the store where I teach.  Remember, the paper is by Fancy Pants Designs from the "Everyday Circus" collection.


This paper is rather difficult to match to solid colored paper in my opinion.  I did have some scrap green that seems to work ok.


Again I added Clear Wink of Stella to the unicycle spokes and you can just make it out.  Funny when I do close ups that the paper looks kinda textured or like moire fabric.


I'm not too crazy about this card but I was drawing a blank as to what to do.  I punched the "ball" using a 3/4" circle punch and cut out the lion for this.  I used the Spellbinder Labels 28 die set and the "Celebrate" is from the stamp set "Celebrate Everything" by Hero Arts.


Here you can really see the glitter shimmer on the ball from the Clear Wink of Stella brush.  But again, the close up shows the moire fabric texture when none is there!  I've looked closely at the paper under my OTT light and that texture just doesn't show.  Weird. I still have some of the paper left over so I will have to figure out what to do with it.

Saturday, September 20, 2014

An "Everyday Circus" Birthday Tag

I have again been asked to make some samples using specific papers by the AZ Scrapbooking store where I teach.  I was given 3 different sheets of the "Everyday Circus" collection by Fancy Pants Designs.  This time it was a bit more of a challenge than the last time I was asked to do this but I did a mess of time on Pinterest and the blogs I follow and came up with 3 cards.  Here's one...


I used my Cricut and the Plantin Schoolbook cartridge to make the "wood" tag, word bubble, and star.  The banners were part of one of the papers. I used my Corner Chomper to round the 2 corners of the "diamond" paper.  I used staples to help hold the cords on and added some more in the lower left corner of the tag.


I was trying so hard to get the glitter shimmer from the Wink of Stella brush on the star but it looks more textured than shiny.  Oh, the stamped text is from the Fiskars set called "All Year Greetings".  I did see something similar to this on the FPD blog after doing a search for this particular paper collection.  In fact, I got 1 other card inspired by the blog and I'll show it next.

Thursday, September 18, 2014

A Freshly Made Halloween Card

I don't normally do Halloween cards but our kids celebrate the "holiday".  We enjoy helping put on a mini carnival at our church with the Gospel being presented and to get children into a safe environment for the evening.  Anyway,  I seen a cool sketch (FMS 154) on Freshly Made Sketches and I have all this paper to use so here's my take on the sketch.


Now, you know I'm a stamper.  I have hundreds of rubber and clear stamps to play with but this card has NO stamping, at least not yet.  There will be some inside but I haven't gotten that far.  I used paper from Echo Park Paper Co. along with their coordinating stickers.


The Witches Brew was stuck to a scrap piece of black so that I could pop dot it above the label.  Card isn't spooky to my way of thinking.  What's your thoughts?  And don't forget to pop over to Freshly Made Sketches!

Wednesday, September 17, 2014

Busy Desk and a Butterfly and Flowers Card

Seems like Wednesdays come every couple of days lately.  Or is it that I sometimes get so busy between them that the days just fly?  Well, whatever the reason it's here again.  And if you need more info on this fun What's On Your Workdesk Wednesday blog tour just click on over to Julia's Stamping Ground blog for the low down on this.

So now my desk:


It's actually in use!  I'm working on some card samples for the scrapbook store to help sell some paper.  Debi gives us a few sheets of paper - I've gotten Fancy Pants Designs "Everyday Circus" papers - and my first card is in progress on the white scrap paper.  The 3 sheets that I'm working with are under my paper trimmer.  I'm not at all wild about the circus panels but am trying to use them.  Can you see that little orange ball?  It's leftover circles from my "Down at the Pumpkin Patch" card samples that have been adhered together.  I did cut a bit off so that it will stand but right now it's rolled over a bit.  But I did get a really cool card made a couple days ago.


I seen a card similar to this on Pinterest but I changed it a bit.  The Spellbinder label die cu has been embossed with a Cuttlebug embossing folder of leaves.  The green vine is a die cut using a Cheery Lynn Designs die.  The little yellow flowers are from a punch and the butterfly is from Spellbinders "Flutters" die cut using vellum.


I added dots of Icicle Stickles to the butterfly for a LOT of bling.


And I added dots of Opal Liquid Pearls to the flowers.  The bottommost flower was added to cover a smudge.  Since I used no ink I haven't figured out how it got there.  Oh well.

Now that you've reached the end of my post please pop over to the Stamping Ground and check out links to desks all around the world.  I will visit a bunch of bloggers/deskers as we're under flood warnings due to Hurricane Odile having reached us.  We have to go through a gully to get in or out and flash floods are quite dangerous.  We are getting rain and had a lot during the night.  And it's raining pretty good right now.  Hubby is staying home as the forecast is to get worse as the morning goes on.

Monday, September 15, 2014

A New Bible Cover

This past Saturday I took part in watching the simulcast of Beth Moore's "Living Proof Live" from Fort Wayne, Indiana.  It was FANTASTIC!  We started at 9 am and finished at 4:30 pm with a lunch break.  There was great praise and worship time with Beth's music team and her 3 teaching sessions were wonderful!  I took over 3 pages of notes and we did a LOT of praying!  One of her statements really spoke to me... "The most beautiful act in Christ Jesus is repentance."  WOW!  And the altar call to accept His salvation was phenomenal!  She also gave us an identity declaration which I printed out and stamped to fit my Bible.


In case you're wondering where I got my Bible cover just click on the Daily Window badge in the sidebar.  My Bible is a large study Bible, the NKJ New Spirit Filled Life Bible with lots of study aids.


Here's a close up of the top flower.  I colored with Copics and added some Clear Wink of Stella to the centers.  I've had this cover for a few years and the vinyl is starting to show some wear and there are some smudges inside where the insert goes so it detracts from my insert.  I did manage to clean it some with the Mr. Clean eraser.  Anyway, I hope to memorize this declaration as I believe it will help me when I get "beat up" by family who hate God or others who are "intolerant" of those with views different than theirs.

Friday, September 12, 2014

The Last Pumpkin Card.... For Now

I'm so glad I got these 4 pumpkin cards done last weekend as I haven't gotten to my desk since Saturday! Nope, not at all and didn't even feel like it. Actually I've gotten some house cleaning done, made brownies, and sorted some piles of paper and junk mail (and that was just Wednesday!).   But I still have 1 last card of the 4 samples that you haven't seen.


I have seen many cards like this and it does fit in with the theme of my class, Down At The Pumpkin Patch". I cut the large shape of the pumpkin, rounded the corners, embossed with the Dotted Swiss folder, then cut into 1" pieces.  I also sponged the edges to make them stick out like the natural grooves of a pumpkin.


I added some lines to my stem using the Copper Wink of Luna brush for a hint of metallic shimmer and just had to add some bling to the leaves.  I like how this turned out and now I can turn my attention to some ideas for November.  Any ideas??

Wednesday, September 10, 2014

Cut-Out Pumpkin With My Desk

Wonderful Wednesday!  I'm taking the day off to get some work done such as fix Dad's dress slacks (clean with Dryel in the dryer then iron), maybe make some cupcakes, clean the dining room table, and think of something for supper.  But first... It's WEDNESDAY!  If you've been following me you know that today I'm taking part in a international blog hop about desks.  You know, the messy tables where we crafters create...  And thanks to Julia at the Stamping Ground who brought this community together.


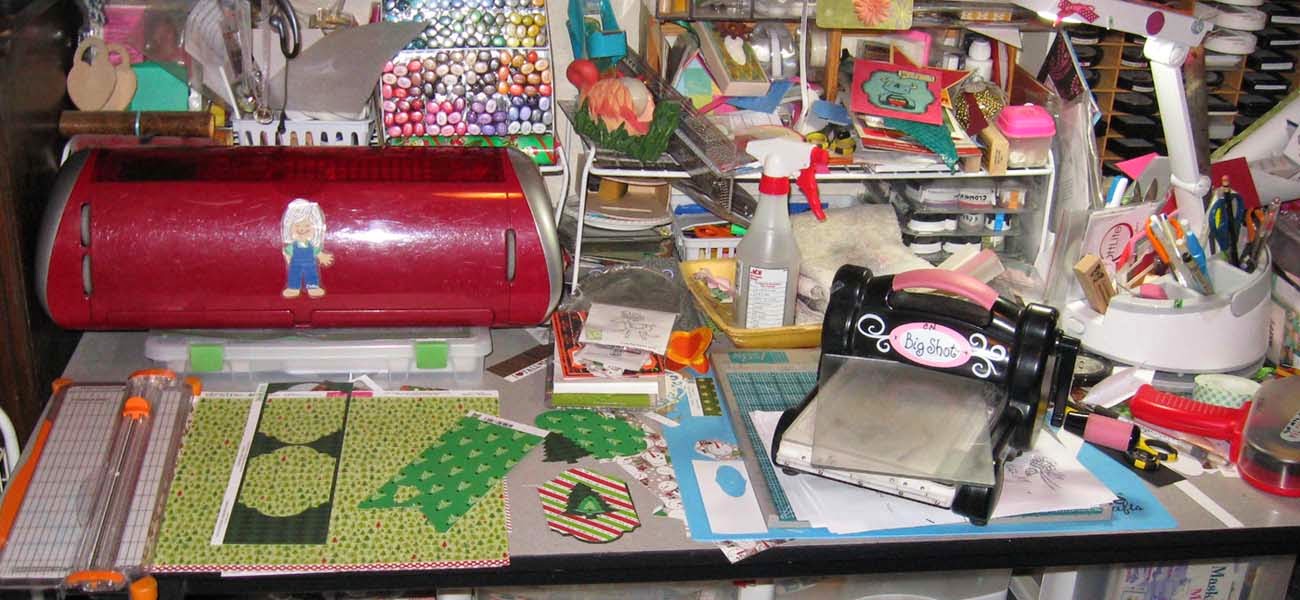
At the moment my desk is rather inactive.  Just the residual stuff from this past week and weekend when I managed to get my 4 card samples completed along with the supply list (sizes of cut papers, inks, etc) and the directions for a class proposal in October. You see my paper trimmer, Cricut, some stamps, my Corner Chomper and a package of rhinestones, my Scor-Pal on the blue mat, then scissors, some scraps, ATG tape gun, and who knows what.  And you can see behind the Cricut where I have stuff galore with my Copics, and "stuff". And if you're interested I've shown 2 cards already so here is the 3rd.


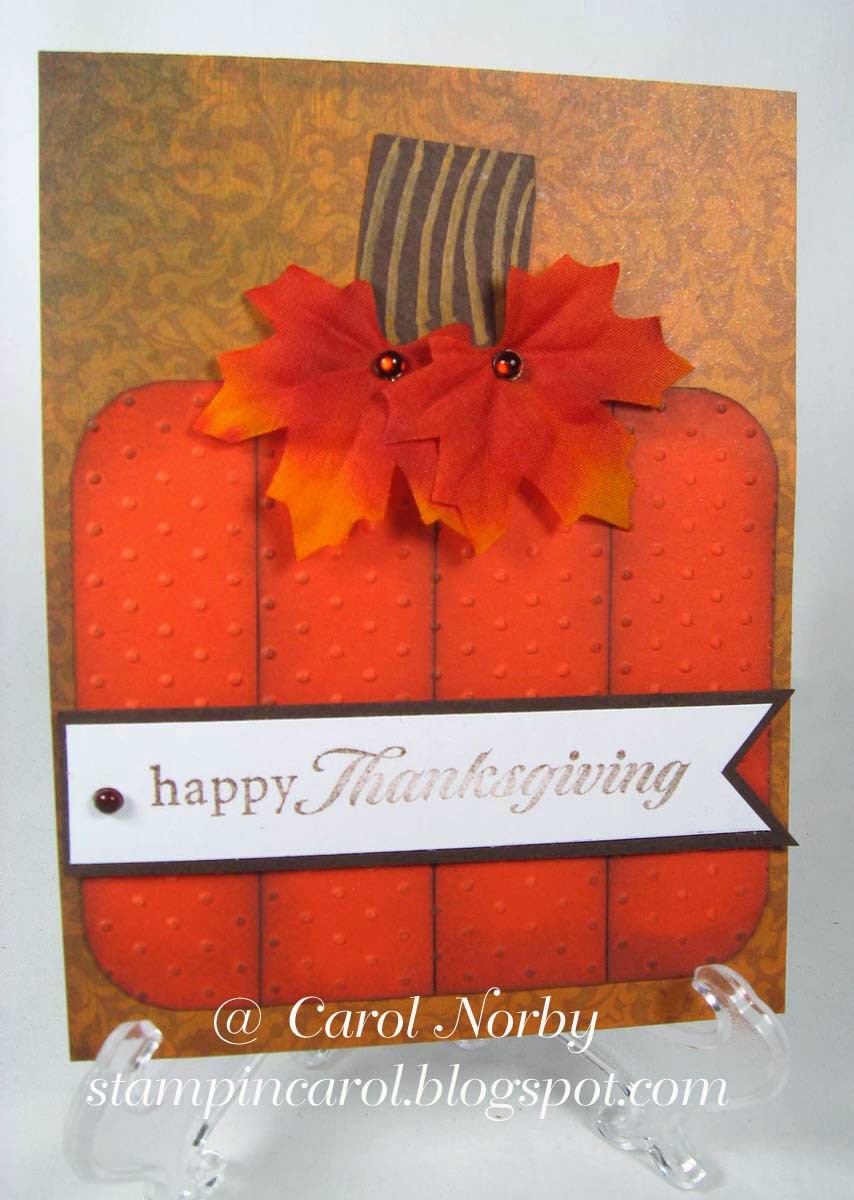
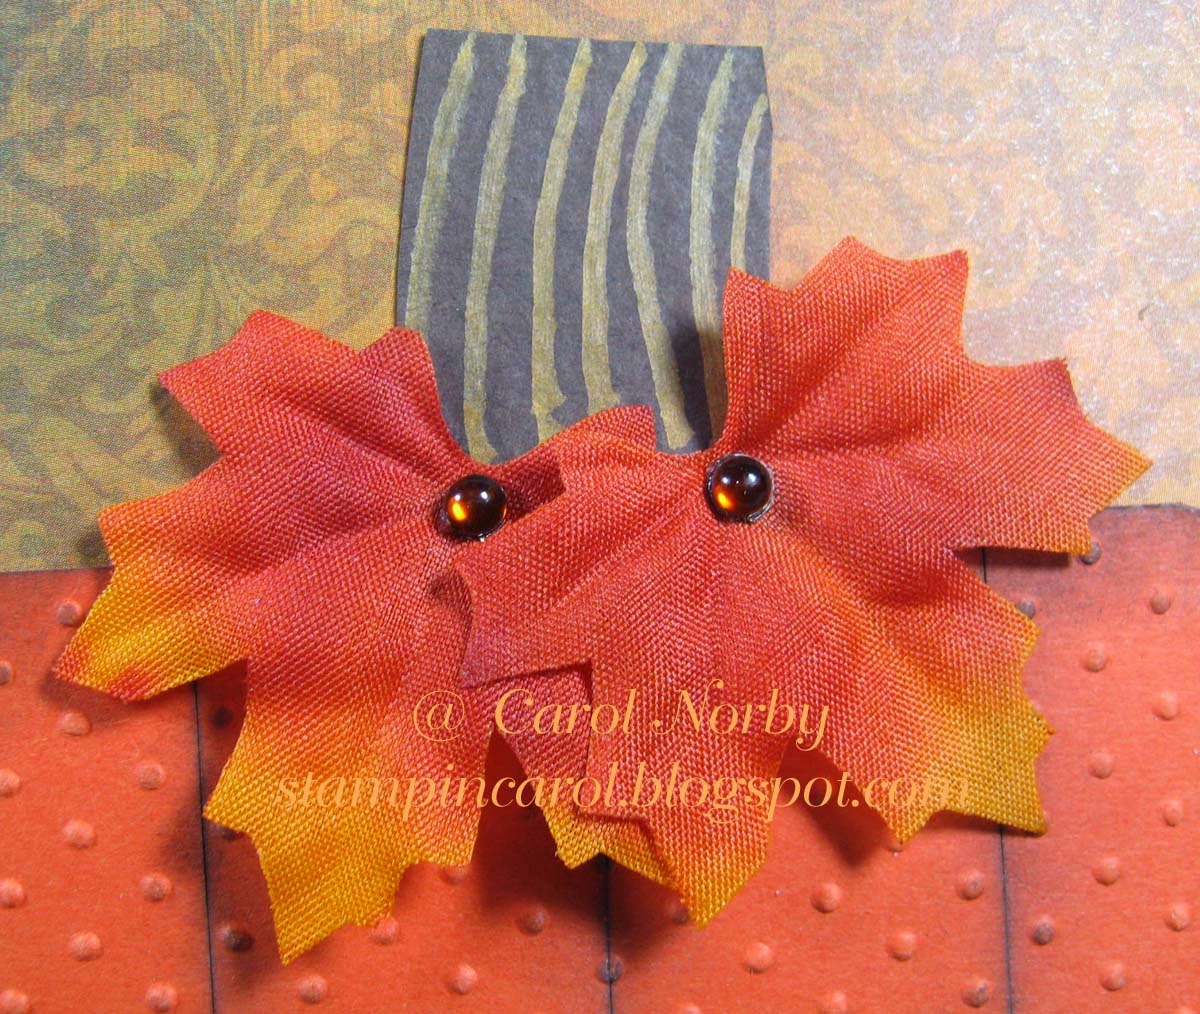
I seen a really cool card on Pinterest doing this and was most excited!  The blogger who made the original card used punches.  I used Spellbinder dies instead.  And I just purchased a Copper Wink of Luna brush which has a subtle metallic look which I used on the pumpkin stem.  My Corner Chomper got a bit of use to round the corners.  I love the option of using either the 1/4" or 1/2" roundings.


Now, isn't this cool??? I never would have thought to "cut away" the inside, just like a jack-o-lantern, but without the face. The blog name is Hands On and you can see the original card by clicking on the blog name.  But now that my post is done, please head over to the Stamping Ground and check out all the other desks.  (And, if you have time, go back a couple posts on Julia's blog and check out the cool ships!!  They are fabulous!)  Also, before you leave I'd love to hear from you about my post if you're so inclined.


Monday, September 8, 2014

A Colorful Pumpkin

I have finished my 4 card samples needed for my October class.  I got a lot of ideas from Pinterest and you got to see one Satuday.  Here's another.  The only thing similar to the card on Pinterest is the ovals to make the pumpkin.  My inspiration card used the Silhouette machine with an SVG cut.  Lots of difference.


I used a Spellbinder die, Labels 28, along with a stamp by Hero Arts.


I hand cut the stem to fit the top of the pumpkin.  I added lines in the stem using the new Copper Wink of Luna metallic brush pen. Pretty cool pen. I sponged the edges of the leaves paper, the Label, and the banner with brown ink. Oh, the ovals are made with the Art Philosophy cartridge and my Cricut machine.

Friday, September 5, 2014

Pumpkins and a Fresh Sketch

I've been busting my buns yesterday and today getting my 4 card samples done along with the supply list and directions for my October class when I seen the Freshly Made Sketches blog for sketch #152.  Lo and behold, one of my cards just happens to be similar to the sketch!  I didn't even look at the sketch before making my card. 


I also seen something similar to this sketch on Pinterest as I was pinning "pumpkin" cards to get some ideas. My Oct. class will be called "Down In The Pumpkin Patch" since I don't do Halloween.... well, I made Halloween cards for the granddaughters and great grand son.  The stamps used in this card are from Hero Arts and Inkadinkado.


I pop dotted a lot on this card. Figured that would help whenever this card gets mailed and protect the gems from possible tearing the envy.  But then again,  I will turn the card inside out and add a piece of tissue or paper towel for extra protection.  I did use my Cricut to cut the circles as I don't have the punches for the sizes of circles I needed.  That baby is sure getting a lot of use this past couple weeks.

So pop over to Freshly Made Sketches.  There's a LOT of cards taking up this challenge and the inspiration projects are fabulous!  (And it's about time I quit making Christmas gift tags for a while.)

Still Making Gift Tags

This will be the last for a while of my gift tags.  I've really enjoyed doing something other than cards for a week and will be back to card making as I need to get some card samples made for my October class.  But what do you think of these?


I only made 4 of these and they are packaged together to sell.  My Cricut did all the work, I just glued things down.  My hubby was most impressed with the centers of the little ornaments on the front.


I had a small sheet (about 4" x 6") of holographic paper and boy, did it make these pop!  I think all colors of the rainbow are reflected in this paper so even this photo doesn't do it justice!

You know Christmas is barely 3 1/2 months away.  I will be starting my shopping real soon as I want to deliver all our gift to Wyoming family at Thanksgiving since we'll be heading north to celebrate our Giving Thanks day with our daughter and son.  Are you getting ready??

Wednesday, September 3, 2014

Desks and Gift Tags

It's a wonderful Wednesday!  Today is "What's On Your Workdesk Wednesday"!  Yep, it's here again!  Sometimes it seems to come more often than weekly but then, the days and weeks are just flying by! (And Christmas will be here sooner than you think!)   If you have any questions about what I'm talking about please click on the WOYWW badge in the left sidebar.  This is all pulled together by head desker Julia at the Stamping Ground.


Now don't faint!  It's relatively empty!  But 2 days ago, oh my gosh!  I was working on TOP of my scrap Christmas paper as my whole desk was covered and my Cricut was working hard.  You may ask what was my Cricut doing... well....


...all of these Christmas tags (and more)!  I was using the Art Philosophy cartridge mostly. Used a bit of scrap paper but still have oodles left over.  I don't want to purchase more until I use up most of my left overs.


You can just make out the glitter from the clear Wink of Stella brush that I used on this.  It's on the berries and leaves.


A bunch of dots of my red Stickles decorates this tree and a gold metallic star at the top.


There is clear Wink of Stella on the red parts of the stocking.


I added some White Opal Liquid Pearl drops on the ornament and some silver metallic paper in the ornament.

I'm hoping to sell these when I have a "hobbyist" both at our local Curves, a women's work out place that I've been attending for almost 7 years.  I will also have a box of cards, other tags, and a couple mitten shaped gift card holders.  I'll also have the Sept. calendars for the AZ Scrapbooking store where I teach on a monthly basis.  I'm debating having a make 'n take.  One question for you, my reader.... What would be a decent price to sell these little gift tags?  Should I group them?  Any comments appreciated!

Please pop over to the Stamping Ground and enjoy this international blog tour!  You'll see great projects and desks (not every day you get to see what other's desks look like).  Thanks for coming by!