Wednesday, September 30, 2020

Desk Time

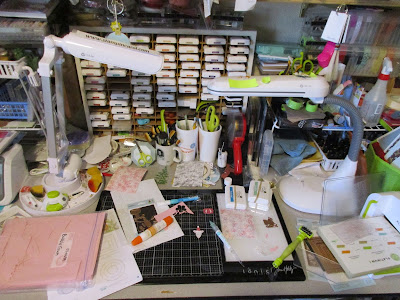
Well (yes, I know that's a hole in the ground) it's Wednesday again.  It's that fateful (??) day when I share a view of my desk from yesterday afternoon and join up with a bunch of wonderful gals who are also brave to share their desks. This is week 591. This just blows my mind! And it's all because of Julia at the Stamping Ground, she holds us together.

My desk is very busy.  I was making a card to show on my video today.  I'm showing an old technique called Saran Wrap Background.  I want to have a card completed to show along with the making of a card.


Let's see... a pack of paper on the left. A die set and tube of glue center left. Part of my design center and a gem picker-upper. Tool-in-One, dies, and my Platinum 6 on the far right. There's also some ink pads center right back of mat. This card I'm working on will be shared tomorrow and the card from the video will be shared Friday.

I've been having quite the allergy issues lately.  My eyes look a bit puffy and my nose is kinda red. Ugh. Hope you all are doing better.

Well, that's it for now. I need to get ready for my video! And to think, this is the last day of September!!

Stampin Carol

He who has a generous eye will be blessed, for he gives of his bread to the poor.  Proverbs 22:9
Tuesday, September 29, 2020

It's A Spooky Cracker Box!

 This past weekend I finished the Animal Cracker Box for our youngest grandson. This is a treat he's allowed to eat so, as a grandma, I had to decorate it for Halloween! And I had to use the new Spooky Cottage die set from Spellbinders!

(This post contains affiliate links.  When you shop through my links I may receive a small commission at NO cost to you! Thanks for your support!)

I covered the box with Black card stock then started adding my elements. I made brownish red grass using my Fringe shears (which I don't use often enough). The door has gold glitter paper behind it for "house lights". 

I die cut the bats from Black pearl paper for a sheen. They really pop on the box! There's even gold glitter paper for the mummy's eyes!

Then I personalized the box with his initials. I used a very old alphabet die set and some blueish grey fine glitter paper from my stash. He may have to have one of his parents slide the box through the sleeve as I made it rather snug.

I did buy more stuff such as gummy frogs and a book, just like any grandma would do. I'm sure he'll enjoy this stuff.

Stampin Carol

Behold, I make all things new.  Revelation 21:3


Monday, September 28, 2020

An Inspired Whale

 I was recently contacted by another "angel" from The Angel Co. It was so fun to reminisce. (I was a demonstrator for this company from 2002 to its closing in 2011.) She recently is getting back into crafting and challenged me and a few other "angels" to do an index card swap. This is all new to me!

(This post contains affiliate links.  When you shop through my links I may receive a small commission at NO cost to you! Thanks for your support!)

So.... I cut my 5 cards (one for each of them and 1 for me) into the 3" x 5" size from some Whip Cream card stock then hopped on Pinterest. Seems they're mostly mixed media in decorating which I'm not good at. But I tried.  Our theme is inspiration and mine have no layers.

So here's my 5.  I started with Fun Stampers Journey's Flower Power stencil and their Lovely Blue Pearl Color Splash. This was a very messy part of the card. I used FSJ's retired Dream Seeker stamp set that has whales, swans, and such, along with a coordinating die set. 


I made sure the stencil image was dry before stamping with my Black Licorice ink. I added some color using gel pens.  The Scripture is from another retired stamp set called Faith Plan. I then added some Blue Skies sequins to finish the cards. I was surprised to see Spellbinders no longer has these beautiful sequins!

I guess I need to make something to hold my cards from our swaps. I've done many ATC swaps but I'm willing to try something different. How about you?

Stampin Carol

The Son of Many has come to seek and to save that which was lost.  Luke 19:10

Sunday, September 27, 2020

New Project Kits Available!

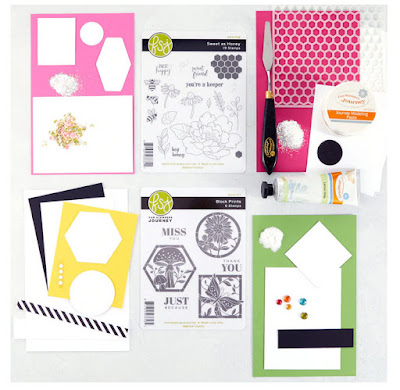
Spellbinders has released 2 new project kits complete with stamps, stencils, glimmer plates, card kits, and more!  Get your hands on new products and start creating!

(This post contains affiliate links.  When you shop through my links I may receive a small commission at NO cost to you! Thanks for your support!)


Buzzworthy Project Kit comes with all you see here!

All this is:

$73.70
$73.70
$48.00
(You save $25.70) 
 
 
Sweet Cardlets Project Kit by Becca Feeken is full of Glimmer Hot Foil products! It comes with:
 All this for:

$92.95
$92.95
$72.00
(You save $20.95)
 

Friday, September 25, 2020

A Wiggle Butt Snowman

 Did you see my video from Wednesday?  This is the card I made on that video. It makes me laugh looking at it. I used one of my favorite Art Impressions Shaker stamp set, Let The Bells Ring.

(This post contains affiliate links.  When you shop through my links I may receive a small commission at NO cost to you! Thanks for your support!)

Yesterday's post gives a couple pictures of assembly and directions, too.

Isn't this a hoot! I'll probably have to include this picture with the card when I send it so the recipient will know how to stand it up. I used Fun Stampers Journey's new Holly Jolly Prints paper pack. This is the most beautiful paper! Double sided 6 x 6 sheets with sheen!
This is the card open.  I have it sideways so to not take up so much room on my post. 

I colored this cutie using my Fun Stampers Journey Color Burst Pencils.  And, though you can't see the Wobble, you can see where is is between the main image and the die cut butt.
My sentiment comes from FSJ's new Holiday Sentiment Stacks clear stamp set. I did 3 different stampings with 3 different colors. This set has 38 stamps!! I used my Clear Wink of Stella brush on the Joy for some pop.

Currently I'm calling this a Standing Easel. It fits. Hope you give it a try!

Stampin Carol

Christ also suffered for us, leaving us an example, that you should follow His steps.    1 Peter 2:21


Thursday, September 24, 2020

Easel? Double Legs? Huh?

 I made my weekly Wednesday FB Live video yesterday and showed this card before making one like it. I really don't know what this is called but it is an Easel and it kinda has double legs. Maybe you can tell me.  I also have some step by step photos after the card photos with measurements but check out my video. It's also on YouTube dated yesterday. The link is in the sidebar.

(This post contains affiliate links.  When you shop through my links I may receive a small commission at NO cost to you! Thanks for your support!)

From this view you're not sure what I'm talking about but you can see that this card stands up! And since I need an anniversary card that is what this became though it looks more like a birthday card. I used a print paper pack from Fun Stampers Journey that I've had for a long time called Yummy Prints. This collection was release in January 2015 when I joined as a demonstrator. I even have an umbrella with cherries which matches one of the papers. Anyway, I picked my base color and inks to match the prints I used.

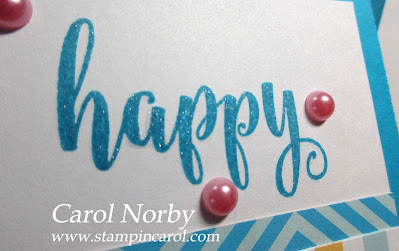
Here you can see the double legs.  This card will fold flat but since I added the pearls it will need some padding and extra postage. The words on my top flap are from a clear stamp set I received from Spellbinders as a gift called Happy Sentiments.
 
I used my Clear Wink of Stella brush on the word as I wanted it to pop more.


I cut a cupcake from a sheet in the paper pack and used the Clear Wink of Stella brush on it, too. This circle is adhered with foam tape just on the bottom half making sure my sentiment could easily be seen. I played with this a bit making sure how I wanted it to work.

Inside I stamped a sentiment on a piece of card stock large enough that we could add a little message and sign. 

The base of this card is very easy and here's some pictures to get you started.


The base requires 2 pieces of card stock. One is 4 1/2" x 11" scored at 2 3/4" and 5 1/2". I wanted you to see the directions of the folds in this.  The second piece is 3 1/2" x 9" and scored at 4 1/2".


This is where and how you attach the 2nd piece. I'm not sure if I did a good job showing you here but my video is better.

From here you start decorating. The 1 card I seen on Pinterest had something on every panel and a gift card holder on the back of the top flap. Cool idea.

Do you enjoy making fun fold cards? I have oodles of videos of the making of so many! Check out my channel.

Stampin Carol

The secret of the Lord is with those who fear Him, and will will show them His covenant.   Psalm 25:14