Friday, January 30, 2015

Reach for the Stars

I have enjoyed making the Kit of the Month cards through FSJ and here are the 2 I haven't shown. I'm glad I got them completed before we left as now I don't have to rush to get something made for today!!


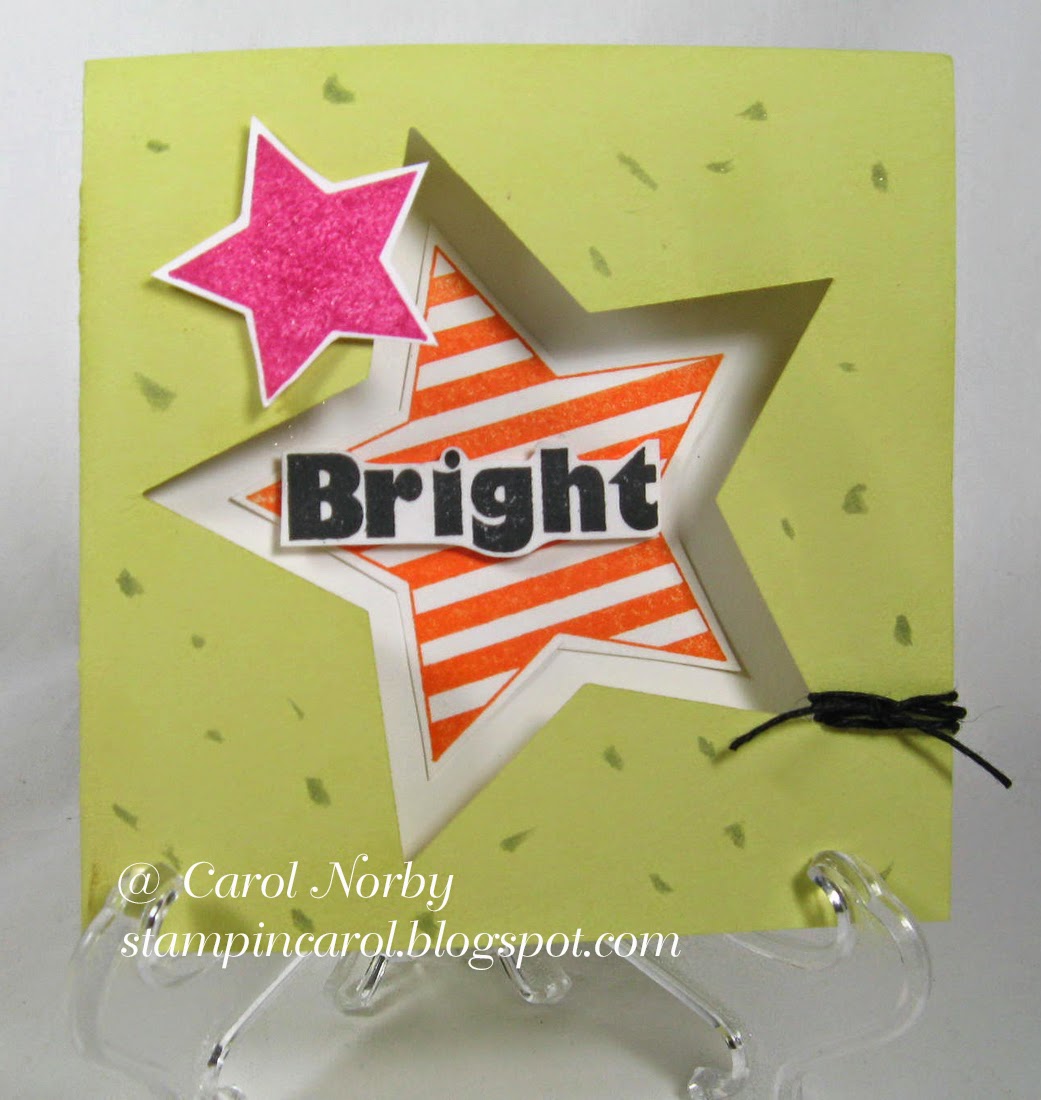
I really like this card, it's very patriotic!  The directions had the blue stars done in black but that just didn't seem right.  I used Journey Glaze (Crystal Lacquer, Diamond Glaze, whatever) on 2 of the blue stars.  I think I should have layered the center text panel on some black card stock so it would show up better.


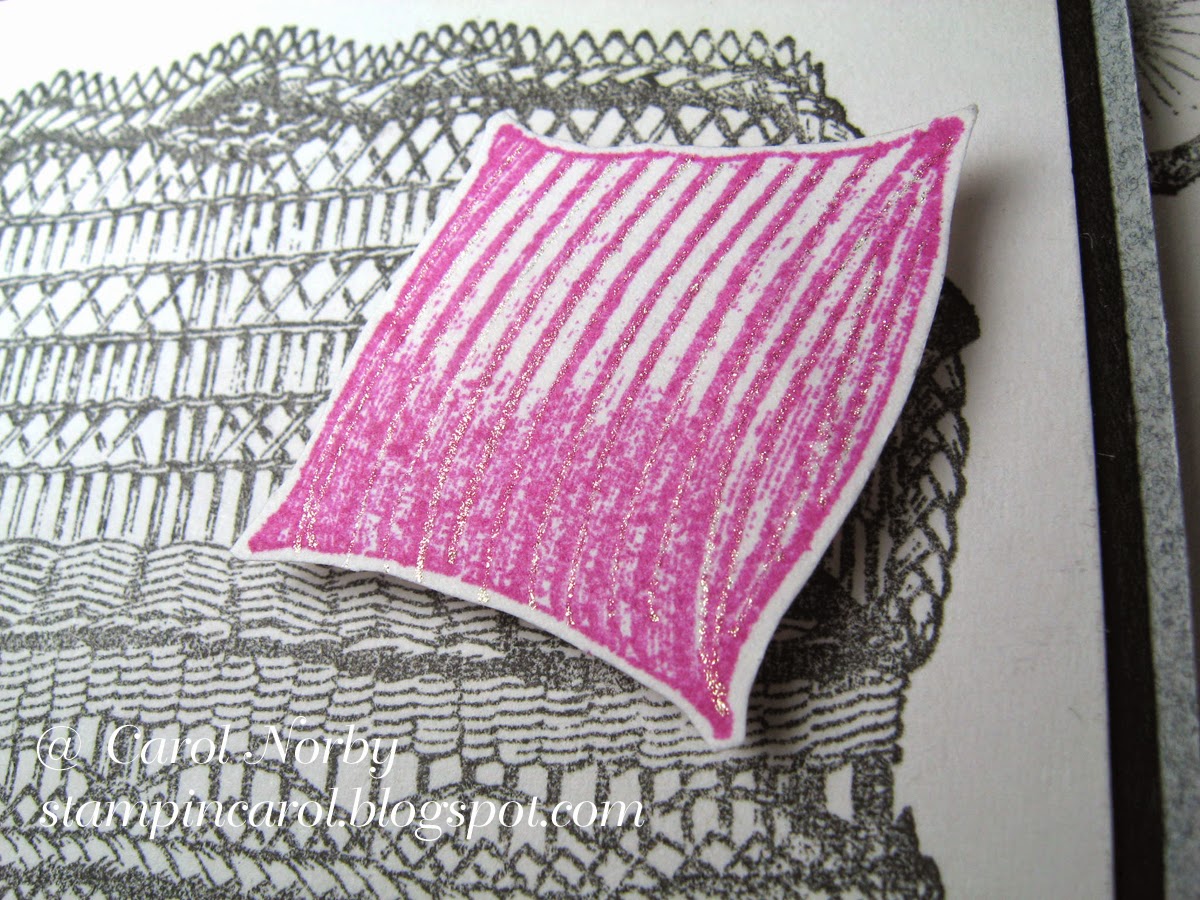
You can see the shine of the Glaze here, too.  Actually my full size pic did pretty good capturing the shine....


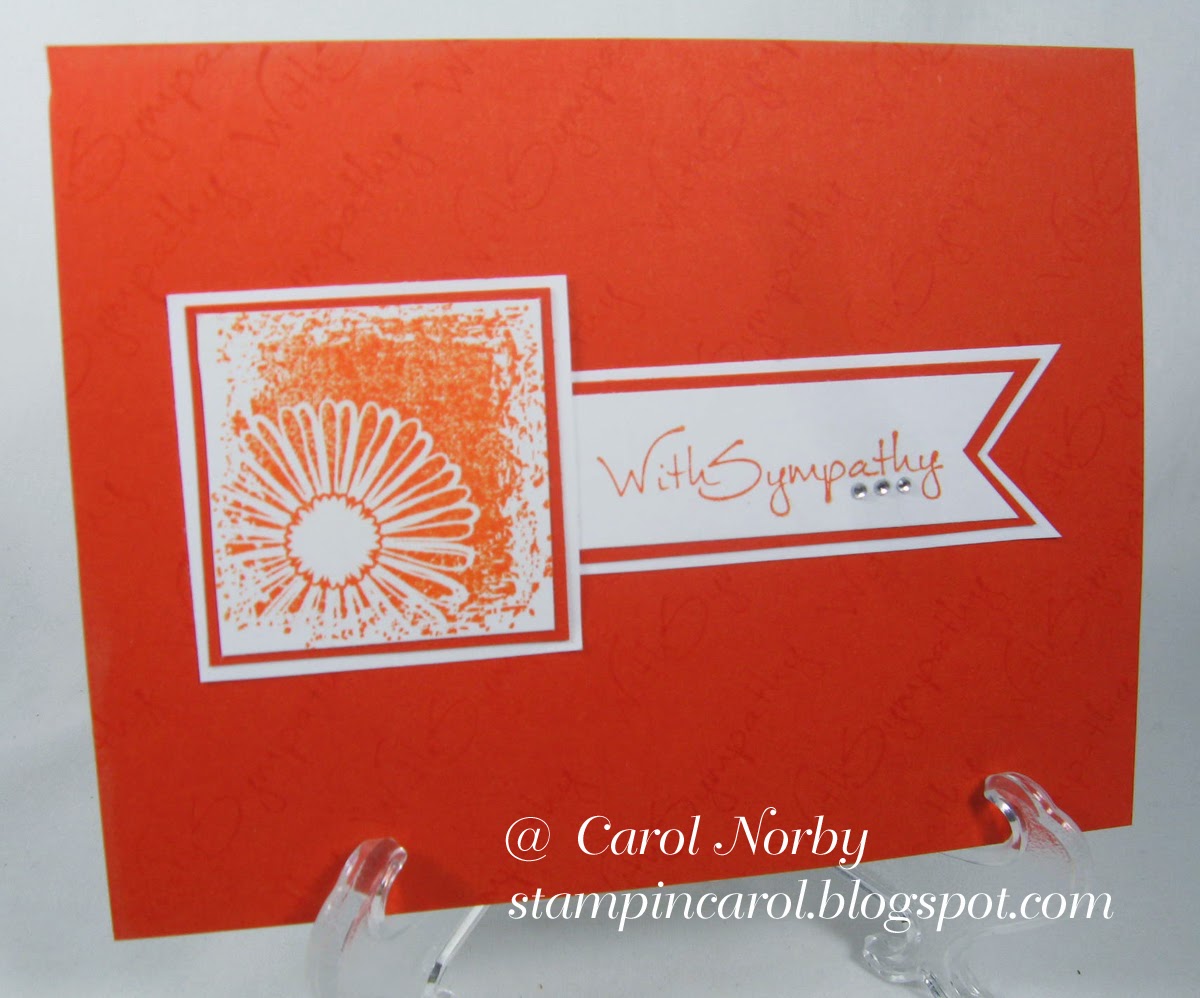
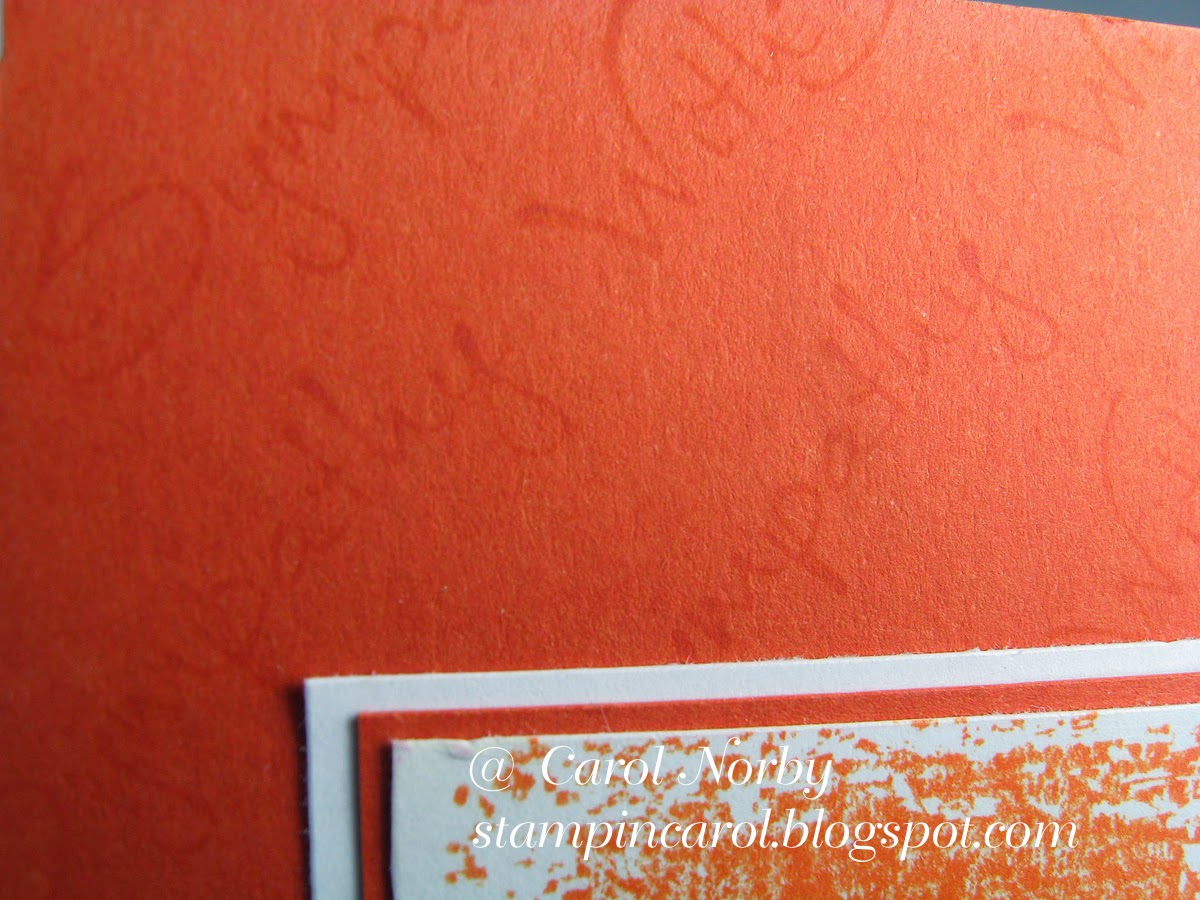
Since I didn't have the background FSJ used I just stamped the smallest star to make the background.  I did layer the text piece on some orange and it shows up so much better.


Twine and sequins sure add to the card!  I touched the twine to some Zig glue to keep it down.  Helped a lot!

I hope you've enjoyed seeing the KOTM projects.  You can order this for about $24.95 plus tax and shipping.  This particular kit may be gone by now but Feb. is right around the corner!!  Oh wait,  it's just next week!  I better work on some more Valentine cards and I THINK that is was the February kit may be about!  And you can order from FSJ just by clicking on the LOGO at the top of the sidebar!  Your products can be shipped right to your house!!

Wednesday, January 28, 2015

WOYWW and a Birthday Celebration

Yep, today I celebrate "What's On Your Workdesk Wednesday"!  A fun day that me and many others give you a look at where we work/play on making our projects.  There are card makers, scrapbookers, mixed media crafters, sewers, knitters, crocheters, and more taking part in this international blog tour of desks.  This is all brought together by Julia, the head desker at the Stamping Ground.  And if you don't know what this is all about you can click on the WOYWW logo in my sidebar.  Now, onward...


Right now my desk is kinda cleaned and ready for me today.  I hope to get a about 5 cards made and 5 others completed  (a pile just to the right front of my red Cricut) on the inside. Definitely a boring desk at this time.

And I've been playing with my new Fun Stampers Journey stamps so that I'll have a collection of samples when I start having home card classes.  The banner (made from a die) and the stamps are all part of the starter package I got when I joined this company.  All the dies in FSJ are made by Spellbinders.  I used my own scalloped ovals die to back the white oval.


I am using paper out of my stash.  I colored the flowers on the banner with Copic markers to match the paper.


The little gems are from a package I purchased at a craft store. The "Happy Birthday" was all 1 stamp but I cut it in half to use like I did.  I do have a tendency to cut text stamps apart to stack the words as long as I don't destroy the integrity of the words.

Now that you're at the end of my post please click on the Stamping Ground to get to the links of the other desks.  Have fun and you may want your favorite cuppa whatever as you can forget time when blog touring!

For those of you who were praying for my most recent mammogram and ultrasound, there is a complex cyst.  I have to have another mammo in 6 months and take those images to a cancer specialist to determine treatment.  Thanks for praying and I will need it again.

Monday, January 26, 2015

Rockin Star

Well, my post title kinda fits.  I have one more card from the FSJ Kit of the Month for January and a Rockin' card.  I'll let you decide...


This is a smaller sized card, about 4" square.  The paper came with the star die cut in the center front.  The directions said to flick some Silver Silk on the front but since I don't have any yet I just dotted with my Silver Wink of Stella brush.  Not quite the same effect but it works for me.  I used the Clear Wink of Stella on the red star so it has a bit of shimmer.


This little gal comes from a set for those who attended a certain The Angel Company annual convention quite a few years ago.  We had a great '50's theme party at the convention and it was an absolute blast!!  There's also a LP record, a poodle, a pair of oxford shoes, and a pair of glasses in the set.  The Happy Birthday comes from a Red Rubber Designs set called Trendy Greetings.  I had an issue with my Clear Wink brush when trying to add dots to the eye glasses.  My brush dripped!  I managed to get most of it up....


I then used my Clear Stardust Gel pen but the chalk on the hair did smear a bit.  Oh well...

Friday, January 23, 2015

Stay Tuned....

I have been having a blast making LOTS of cards recently and today I made one for our son whose birthday is this next week.  Yep, gotta get it in the mail right away!  He's a football fan and so I used 2 elements in my card of his enjoyment..  But it's not what you think....    And this card is also in response to challenge 204 at Red Rubber Designs.  (It's about time I started in on challenges again.)


First of all one needs a television.  He has gone to games in person but mostly he watches from his living room.  He is a Sea Hawks fan so I know where he'll be on Feb. 1st!


And this is where he sits.  I used scrap paper and matched my Copic markers to the paper.  All stamps are by A|Muse Studios.

I did make another Birthday card using the "Nautical View" set by Fun Stampers Journey.  I also used dies by Spellbinders.


A bit of green burlap, buttons, and sponged edges and voila!


Here's a bit closer look at the focal point.  Turned out pretty nice!  I think I have enough cards to last for a LONG time of posts!

Now pop on over to Red Rubber Designs and check out the challenge and the challenge takers!

Students and a Card

A couple Wednesdays ago I taught a class at Green Valley Recreation and had 2 students.  Neither had ever stamped and one probably never will.  They made little drawers with an easel on the top.  You can click Here, Here, and Here to see post showing what we made.


Sue, from Canada, had a blast and has signed up for all 3 of my classes.  Her project is for a granddaughter.


Janice, a quilter, had fun but this just wasn't her cup of tea.  She did seem to have fun making the little cards from the scraps and I die cut some cowboy boots to go with her southwest theme.


I started on my cards using the FSJ Kit of the Month.  I got all 4 done but screwed up one.  Each one is a bit different then the actual directions as I didn't have all the ink colors or stamps used.  I received all the paper needed, precut, embellishments, and a cool stamp set called Star Bright.  This set of 4 stars and 3 phrases will be available in about 3 months.


The company used a stamp called Ink Splat in this yellow area.  I just used the corner of an ink pad and made the background.  I also do not have the Silver Silk so I used my Silver Wink of Stella brush.  Turned out pretty good to my way of thinking.

And today is Wednesday but I'm not taking part of the What's On Your Workdesk Wednesday since I'm on a mini vaca with hubby.  He's actually working and I'm along for the ride. But please check out the Stamping Ground for those taking part today.


My hubby got me this little guy back in 2004 as our internet was horrible.  Couldn't connect or stay connected.  Just frustrating waiting for something to work.  Unfortunately the chair back is long gone.  The only change should be that the computer should say "Pinterest Too Long."  What a hoot!

Wednesday, January 21, 2015

A Quiet Place and A Desk

What a beautiful day here in southern Arizona!  Sun is shining, temperature is supposed to get to the high 70's F.  And it's the day when you get to see my desk and the desks of many other crafters (if you so desire).  This is all brought together by our head desker, Julia, at the Stamping Ground.  If you're new to this please click on the WOYWW logo in the sidebar when you're done reading my post to learn more.  And please click through to the Stamping Ground to get the links to up to 100 crafters who take part is this fun blog tour.


Here I just finished cutting out a couple banners and the matching stamps are sitting to the left with a little stamp on the acrylic block to the right of the ink pad.  The negative of the banners is at the top of my Scor-Pal.  I seen a cut card in our Fun Stampers Journey artwork page on FB and I wanted to try it.  Some days I have such brain burps getting ideas....

I was searching for a particular stamp set when I seen this on on my shelf.  I haven't used it in ages and decided to use it instead.  (And now I can't remember what I was looking for.)


I purchased it from The Angel Company years ago and the set is called Sit Quietly.  There are 9 stamps in the set and I'll use one of the text ones for the inside when I get that far.  I added the hot pink twine from The Twinery and a matching pillow along with the black rhinestones.  Doesn't this look inviting?


I used my Stardust Clear Gel pen on the lines of the pillow but I just couldn't get a good picture of the shimmer. I think you can get a hint of it in the lower right corner but you may need to click on the photo and enlarge it.

Now that you have reached the end of my post please click through to the Stamping Ground!  I get inspired and learn some organizational ideas, along with making friends all over the globe!  Enjoy!

For those of you who were praying for my 2nd mammogram and ultrasound last week.... I still haven't heard the results from my doctor but the 2 technicians were positive I have a benign cyst.  Why can't doctors be more speedy?  Anyway, I appreciate the prayers!

Monday, January 19, 2015

The Last Two Sympathy Cards

Here's the last 2 sympathy cards I made for my cousins.  I hope not to have to make any for family members for a long time.  All stamps are by Fun Stampers Journey.


I think I have run out of ideas for now on using the cool Sentimental Prints set.  I did not cut the center layer in a square and love how it is just a bit wonky.


Here's a bit closer look at the center panel.  I added some itty bitty rhinestones and think they did add to the card quite a bit.  I have oodles of scrap paper and that's what I'm using. Not even making a dent in the baskets...


This card I used a different set, Rose Garden, for the focal point.


I colored the flowers with chalks then added the little rhinestone to the center of each.

The cousins that looked at their cards loved them. The service was pretty nice and my brother did an excellent job on the video of my aunt's life.  Great memories but heartache over the loss.

Friday, January 16, 2015

A Couple More Sympathy Cards

Today is the funeral for my aunt.  I made sympathy cards for all my cousins in her family.... 6.  I posted a couple Wednesday and here are 2 more.


Since I just purchased this "Sentimental Prints" set from Fun Stampers Journey, I have been playing with it.  I love how the stamps are so versatile and there are quite a few different phrases in the set.


I used this set for 5 of the 6 cards and this is card 4.  Except for the top card every one has some rhinestones on it.  I wanted the cards to be special for my cousins as we are pretty close.


I stamped the text on the orange layer on a diagonal to make a pattern.  It is faint but that's what I intended.
The inks used are also from FSJ but the card stocks came from my scrap bucket.  I sure have a LOT still!

Tomorrow I hope to work on FSJ's Kit of the Month cards.  I will be substituting some of products from my stash (some from other companies if I have to). Yesterday I had more tests (another mammogram and an ultrasound) and hopefully I'll hear from my doctor today.  The 2 technicians said the "abnormality" looked like a benign cyst according to their experience.

Wednesday, January 14, 2015

My Wednesday Desk and Sympathy

Even though today is a beautiful day I spent most of yesterday making sympathy cards.  The reason I take pictures of my desk is that I take part in an international blog hop consisting of crafters from around the world who get together and give you a look at where they work. I've seen such fabulous projects and great organizational ideas on those desks.  This is all brought together by Julia at the Stamping Ground and she has been doing this for over 5 years!  (If you want more info about this fun "trip" please click on the logo in the sidebar.)  So when you get to the end of my post please click over to Julia's and check out all the other desks in this hop.


So my desk....  I did get a new OTT light as my old one wasn't working properly.  I replaced the light bulb a couple months ago but it would flicker for a while before actually working right.  (I did get this new one at 55% off at a sale.)  There's also some sympathy cards (I made 4 yesterday and need to make 2 more today) to give to my cousins at my Aunt's funeral Friday. There's new Fun Stamper Journey products on my desk as I got a big order in on Monday, my beloved ATG tape runner, and a pile of card stock. I have to prep for a class this afternoon at a local recreation center.  I have 2 "students" and one called me with so much excitement so I'm excited to teach!  But on to my cards...


All stamps and inks are by FSJ.


I really should have spaced the 2 background images a big more.


I not only put 3 itty bitty clear rhinestones behind the text but I put 3 on the image.

Ok. Now you're at the end of my post.  I do have a request before you travel on to another desk via the Stamping Ground.  I am going in for a second more invasive mammogram and ultrasound tomorrow to investigate an "abnormality".  I would appreciate your prayers that all goes well and there is no such abnormality.  I have had 2 cysts drained/biopsied 8 and 11 years ago.  Thanks so much!


(Oh, BTW, I did add a Pinterest button with others down below here if you need one.) 

Monday, January 12, 2015

Hugs & Kisses

I am anxiously awaiting my BIG order from Fun Stampers Journey!  I ordered 10 ink pads, some more dies, and some stamp sets.   I hope to schedule a couple parties and need to have more than just 3 stamp sets and 4 ink pads!  Hopefully today the big brown truck stops by....  Plus I should be getting my Kit of the Month, too, which includes a stamp set, precut paper, and some embellishments.

But I did have fun with 1 stamp and love how this card came together!


This background image is the "Damask Print" stamp from the ATS collection for $7.95.  The text is from the "Greet & Shout" set (of 10) for $21.95.  I did cut the phrase into 3 pieces so that I could stack the words to fit what I wanted to do.   Isn't the paper gorgeous?  It and the ink are called "Sweet Berry" and coordinate so wonderfully!


I had this stamp and a bunch of others in a drawer and I was quite pleased it matched the paper!!  And I just had to add a bit of white scrappers floss and the dashes on the paper to finish the look.  This card would be great for either an anniversary, Valentine, or even birthday card!  Hmmm.....  too bad I showed it to hubby.
I did make another card similar to this using the same paper, Damask stamp and layout but with a birthday text.  Will show it later.

Saturday, January 10, 2015

A Couple Flip Cards

You are in for a treat today!  I've been enjoying my new Fun Stampers Journey stamps that I thought I'd better post these two before they get lost or forgotten in my gallery!  I did not use any special dies to do these, just a couple by Spellbinders then I went from there.


I love this card!  I used assorted dies starting with a Scallop Circle die to make the flip.  Heartfelt Creations Classic Sunflower stamps and Die made the center flower.  For the life of me I can't remember who made the corner dies...


I only used 1/2 of my Scallop Circle die to make this flip section.  (Wished I could find this card....)


Here's a closer look at the flower.  This card took over an hour to make.  (I even cleaned off my desk trying to find this card....)


And the second card.  Same style.


The cool pattern paper I designed years ago using shaving cream and reinkers.  I taught a bunch of friends in eastern Wyoming this technique about 8 years ago.  We had a blast!!  (I have a pic of all the gals that attended my class that day and we even had an article about the class in our local paper.)


I used stamps from Red Rubber Designs (not all are available for purchase yet) to stamp inside.  At least I still have this card.....