Friday, October 31, 2014

Oh Horse Feathers!

Actually the feathers are from a stamp set by CTHM!  And yes, I know horses don't have feathers, at least all the ones I owned over the years didn't (but I like the phrase).  While at retreat last weekend a sweet lady wanted me to try a new die she purchased of scallops.  I think she said she got it from SU!


It's a nice die but a bugger to adhere to my card!  I told her she needs some sheet double-side adhesive such as Stick It (which is brand new and hard to get but there are other brands similar).


I added a line of Stardust Clear Gel pen to the center vein of each feather as I felt the card was missing something.  Still not sure that's enough, what's your thoughts?


Last weekend I worked at a scrapping retreat for the AZ Scrapbooking store at a fabulous resort in Rio Rico, AZ.  I had to have a costume for the costume contest even though I wasn't eligible for the contest.  I found this suggestion on Pinterest.  I have about 16 name labels all over me with customer names on them.  Can you guess what I was?  My identity is a bit difficult and I'm a feared person in this age of technology.  Give up??  I was an Identity Thief!  What a hoot! Tonight our church is putting on a mini carnival as a safe environment for kids.  I'll be working there from 1 - 9 pm then tomorrow I'll head up to Mesa, AZ for a stamp convention.  I have 2 free tickets but couldn't find anyone who wanted to ride or or anyone who had a place for me in their car.  Bummer.  Guess I'll be my own company.

Wednesday, October 29, 2014

Workdesk Wednesday 282 and A Spring Loaded Card

Wonderful Wednesday.  A great day for a blog hop of desks!  If you've been following me you know what today represents.  If you're new please click on the WOYWW emblem in the side bar.  And this fun blog tour is all because of the head desker, Julia, at the Stamping Ground!  I enjoy getting the opportunity to see all the different work areas, organizational ideas, and fun projects!


I'm still unpacking my stuff from a retreat this past weekend.  Since I was on staff with the store that sponsored it I ended up working instead of making.  I did get 1 card done and you'll see it here.  But my desk, I finally got my blue craft mat back where it belongs and most of this stuff put away.  This mess just bugs me terrible because I cannot think of creating anything with there is so much stuff in my way!


This card is one of my samples for a class I'm teaching in February.  I need to get all my cards for the 3 classes done REAL soon so that I can take pictures and make up 25 posters to advertise.  I used some dies to make the flowers and butterflies.


It is hard to see and I could NOT get a good picture but I punched out a 2 1/2" circle of acetate and cut it into a spiral.  The center "end" is glue dotted to the bottom and the outer "end" is on the top. I covered the ends with a butterfly and flower.  I have each of those also adhered to the clear spiral to make them float.  I'm way more please with the acetate than using card stock for the spirals but I will teach both to my class.  You can click on the picture to enlarge it for a closer look. Oh, I embossed clouds on the top panel and flowers on the bottom. 

And now that I'm done with my post please don't forget to pop over to the Stamping Ground and take part in the hop.  Be prepared to spend some time with your eyes on your screen!!  There's much to see!

Monday, October 27, 2014

A Vintage Bathing Beauty

This past weekend I worked at a scrapbooking retreat put on by AZ Scrapbooking of Green Valley, AZ.  I did manage to get 2 1/2 cards done with all the stuff I had to do.  I didn't bring a lot of stuff as I knew I would be kept hopping.


The bathing beauty and text is by A|Muse Studios from a set called "Bathing Beauties".  Unfortunately I forgot my special paper for Copic markers so the black in that defines her chin bled a bit.


I ended up adding the sequins because the text stamp had a "halo" by the first word and it was way obvious.  I paper pieced the swimsuit and will be adding some bling to the flowers on the hat.  Isn't the fish in the swimsuit a hoot?

Friday, October 24, 2014

A White Pine Sympathy Card

A friend of ours passed away this week and I made a card in memory of Keith.  He was 91 years old and died of lung cancer.  He was such a sweet man, full of humor and love of the Lord.


He was from the Denver, CO area and he went back there to be with family just before he passed.  This card was sponged showcasing snow on the ground and a sunset (or sunrise).  I used the negative of a Spellbinder die to keep my colors inside.  I then stamped the tree in VersaMark ink then embossed with white embossing powder.  I originally had the text directly on the card but I smudged badly so it is layered.


I got out my white gel pen (by Ranger) and added tiny stars in the darker purple sky.   Stamps are by CTMH.

Today I'm at a 3 day retreat for the AZ Scrapbooking store of Green Valley, AZ.  We're at the Esplendor Resort at Rio Rico, AZ   It's an older resort and has been modernized.  This is our 4th (I think) retreat and we hold 2 each year, March and Oct.  I will be posing pics next week of some of our fun and if you're on FB we do have a page there that I'll be adding to on a regular basis this weekend.

Wednesday, October 22, 2014

Workdesk Wednesday and Gingerbread Boy

I think I'm getting brain dead.  It's been a difficult past week and I'm now packing for a 3 day scrapping retreat.  THAT is the good part!  But today is the weekly day you get to see my desk and have the opportunity to see many others!  This is week 281 so you know this weekly blog tour has been going on for over 5 years.  I've been taking part for almost 2 years.  I enjoy seeing the desks of other crafters and getting inspiration.  This tour was started by head desker Julia at the Stamping Ground.  What an amazing long lasting blog tour! 


My desk is starting to get loaded with some of the items I need for the retreat.  I leave tomorrow!!  I still have to get my small table out of storage and pack 3 totes!  And can't forget the laptop as I post pictures to the store's FB page for the gals that couldn't come.  So, you see here my Tonic paper trimmer way on the left and my Cricut.  Then there's rhinestones, acrylic blocks, sponges, black ink pad & scissors, sanding block, foam mounting tape, and my ATG tape gun.  I still need to grab glue dots, envy punch board, glue dots, more acrylic blocks, Copic markers, more ink pads, Big Shot and dies (well, those are packed with the paper), munchies, and embellishments. And then stamps for sale, some punches for a project, and maybe my Cricut mat and cartridges.  I plan on being at the resort Thursday afternoon to help decorate. The retreat starts officially Friday morning at 10.


I made this card for my Technique Junkies 1 on 1 swap.  The technique is called Glossy Outlines and this is my first attempt.  I'm not sure I like how the text banner is situated.  I really should have made this card landscape instead of portrait.


I stamped my little guy in black ink, colored, then outlined with White Opal Liquid Pearls.  I had some issues with outlining the tiny hearts on his chest.  I filled the hearts and his cheeks with Glossy Accents.  Stamps are by The Angel Company (closed 2011).

Between packing and sorting I will be touring blogs so please join me by going to the Stamping Ground!  Usually there's about 80 - 90 taking part so be prepared to take some time!!


Monday, October 20, 2014

A Folding Easel Box Card

This past week I started on my card samples for some classes I'm contracted to teach at G.V.R.  I showed you last week the Simple Gift Card Holder for a December class.  Now I'm working on January, February, and March.  In Dec. I'll be teaching this card and I learned it from the "Fancy Folds" CD by Technique Junkies.


I found this cool paper in my stash and it just screamed masculine.  So, out comes my "Outdoor Man" Cricut cartridge to decorate it.  It took a few tries to get the fish the size I wanted.


I added some bling to the fins, tail, and eye using my Stardust Clear gel pen.  The drawer is about 3" by 4" and can hold posty notes, paper clips, or whatever.  The easel could also sport a mini calendar such as those by Vippies.  Now I need to make a feminine sample so back to the work table!

Friday, October 17, 2014

A Simple Gift Card Holder

I had to quickly make a gift card holder for a December 3 class at GVR (Green Valley Recreation).  I haven't tried to have a class in Dec. for years and thought maybe teaching 3 different gift card holds might work.  I now have mini posters in to the head office to be distributed to the 24 GVR social clubs and will have to be ready a couple weeks before Thanksgiving as we'll barely get home in time for this class.


It's only about 4" wide by 3" high.  At this time there is no stamping and it is pretty easy to make.


And open.  One could easily stamp some text and adhere to the top or bottom inside flaps.  I'll also be teaching the Stocking and Mitten holders in this class so I hope it goes.  I have posted those way back when so if you can't remember just click on the Christmas label in the bottom sidebar or do a search using the search box.

Thursday, October 16, 2014

Taylor Swift - Shake It Off - PINTEREST PARODY

I seen this on another blog and just had to share!  And I do believe it!!  I think I'm on Pinterest almost every other evening while we're relaxing and watching movies.  What a hoot!


Wednesday, October 15, 2014

Desks, Snowmen, and Baked Pizza Mac

It has been a very busy week and weekend and I need a breather!  I had to get my 4 card samples done, help hubby work on a piece of farm equipment he's repairing on the side, get a gift holder done for a December class so I could get posters made... WHEW!

But since this is hump day, middle of the work week, or better known as Wednesday I get the opportunity to show you my desk and you get the opportunity to see my work area and go on a world wide desk blog hop!  Yep.  Desker day!  I think I like that better than Hump Day.  And this fun blog tour of desks is sponsored by Julia over at the Stamping Ground. (Seems like I'm unable to keep my post to 1 or 2 pics but I love sharing what I do!)


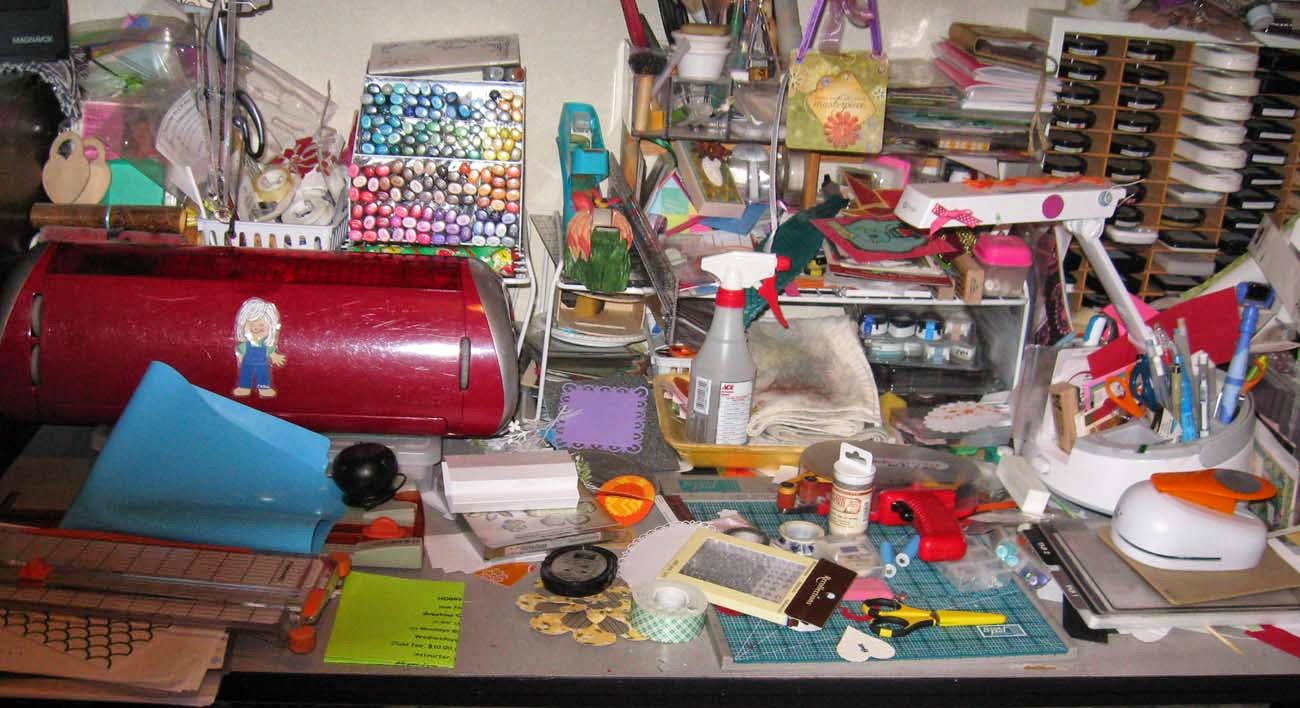
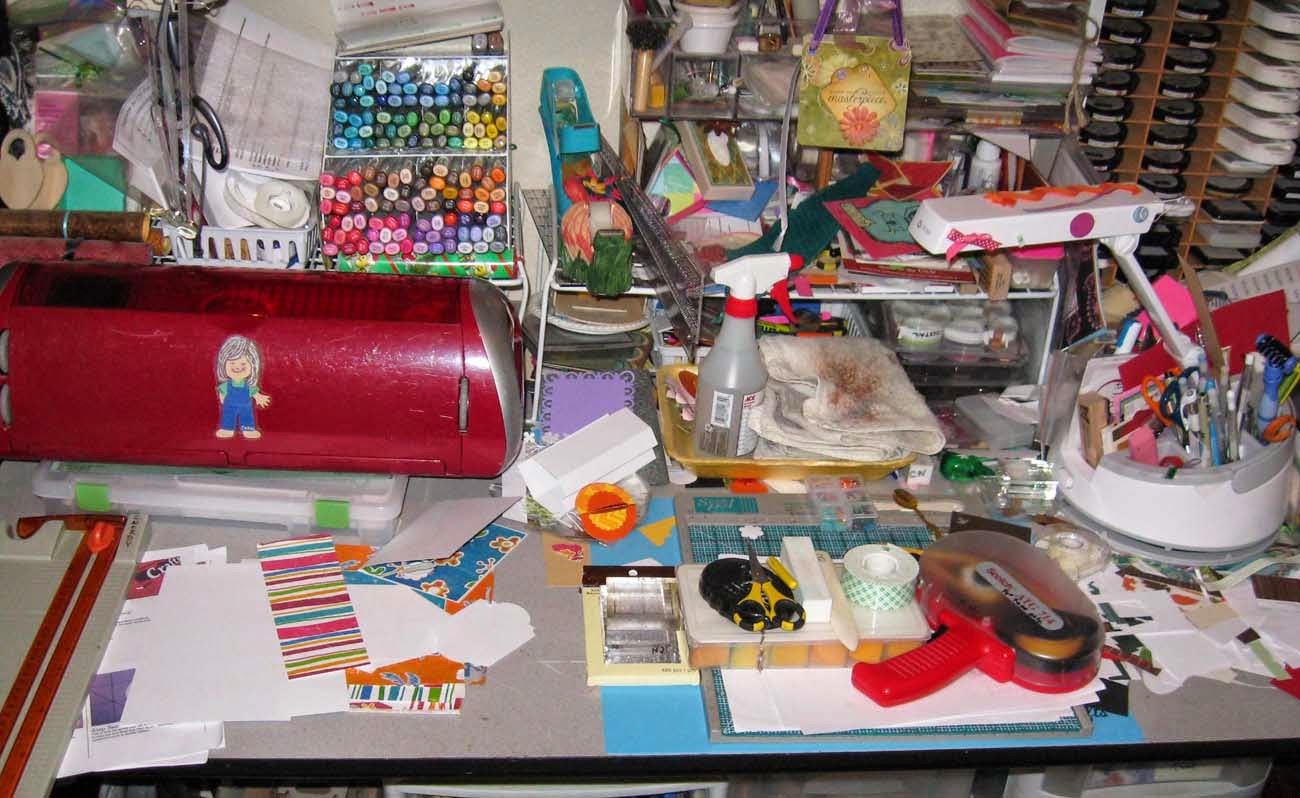
I'm getting ready here to start up my Cricut to finish a project that is just to the top left of my Tonic paper trimmer.  Since it's not completed I won't be posting it until Friday or so.  But my desk....  My open Cricut and mat take up almost 1/2 of my photo.  I have my Outdoor Man cartridge in and I have the page open in the book to what I plan on cutting.  (My project is very masculine which is weird as ladies take my classes.) Then you see my directions I'm following between the Cricut book and my paper trimmer.  To the right of the trimmer is my scissors, sanding block, and various small scraps of paper.


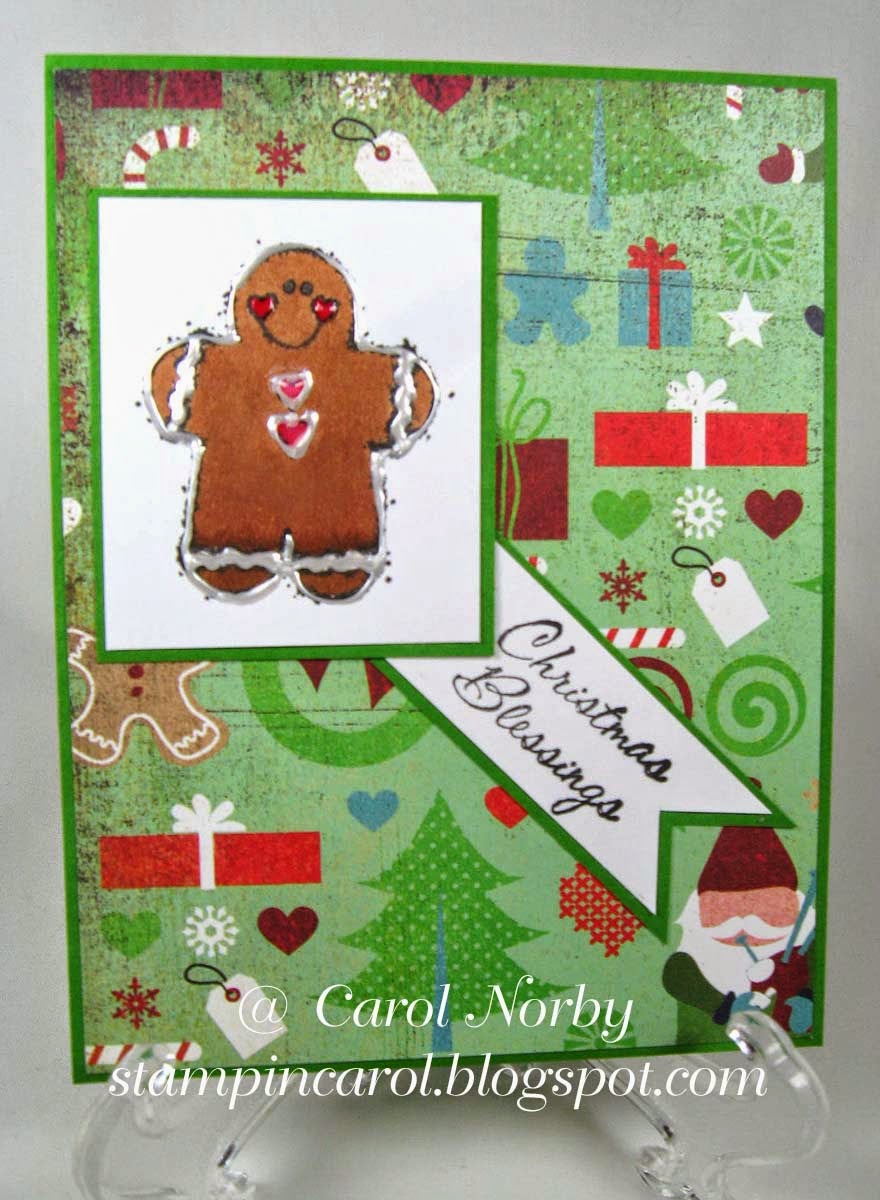
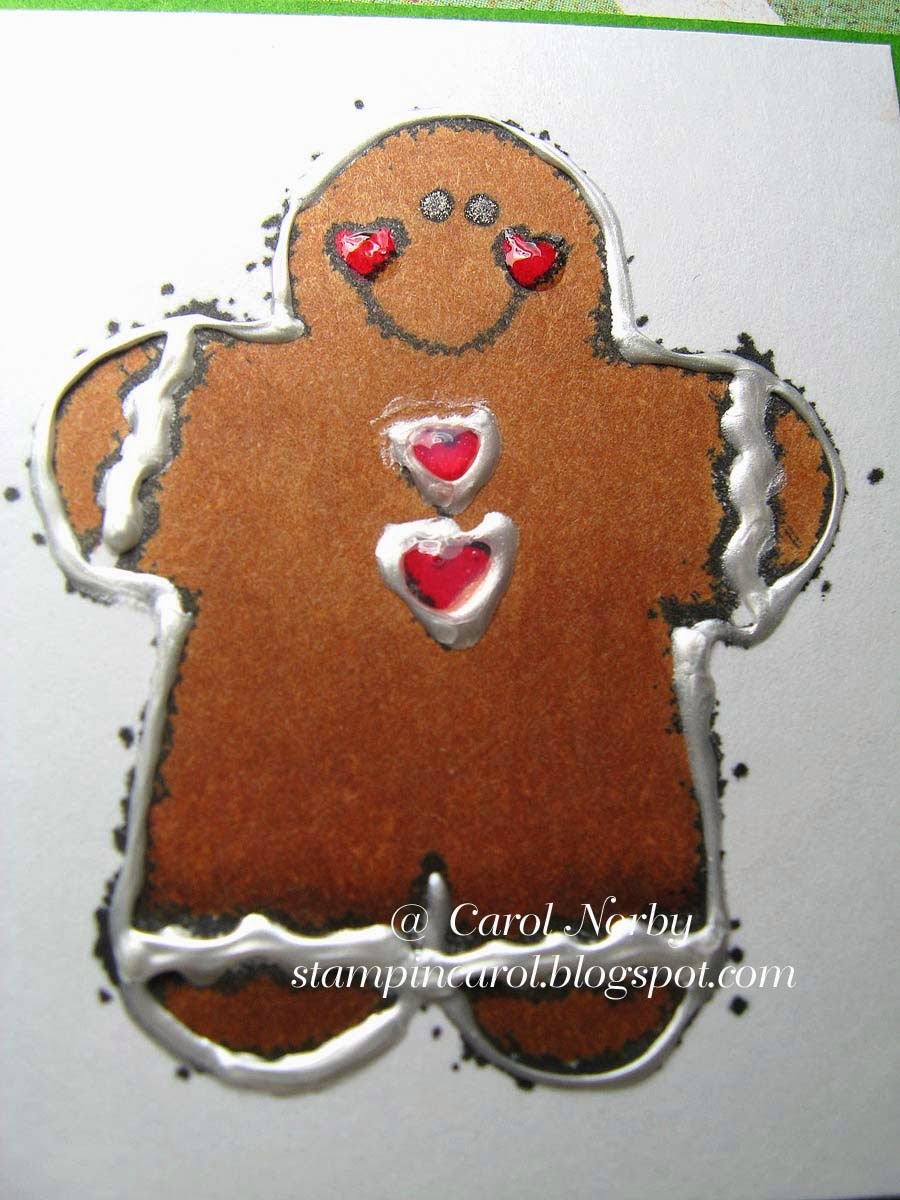
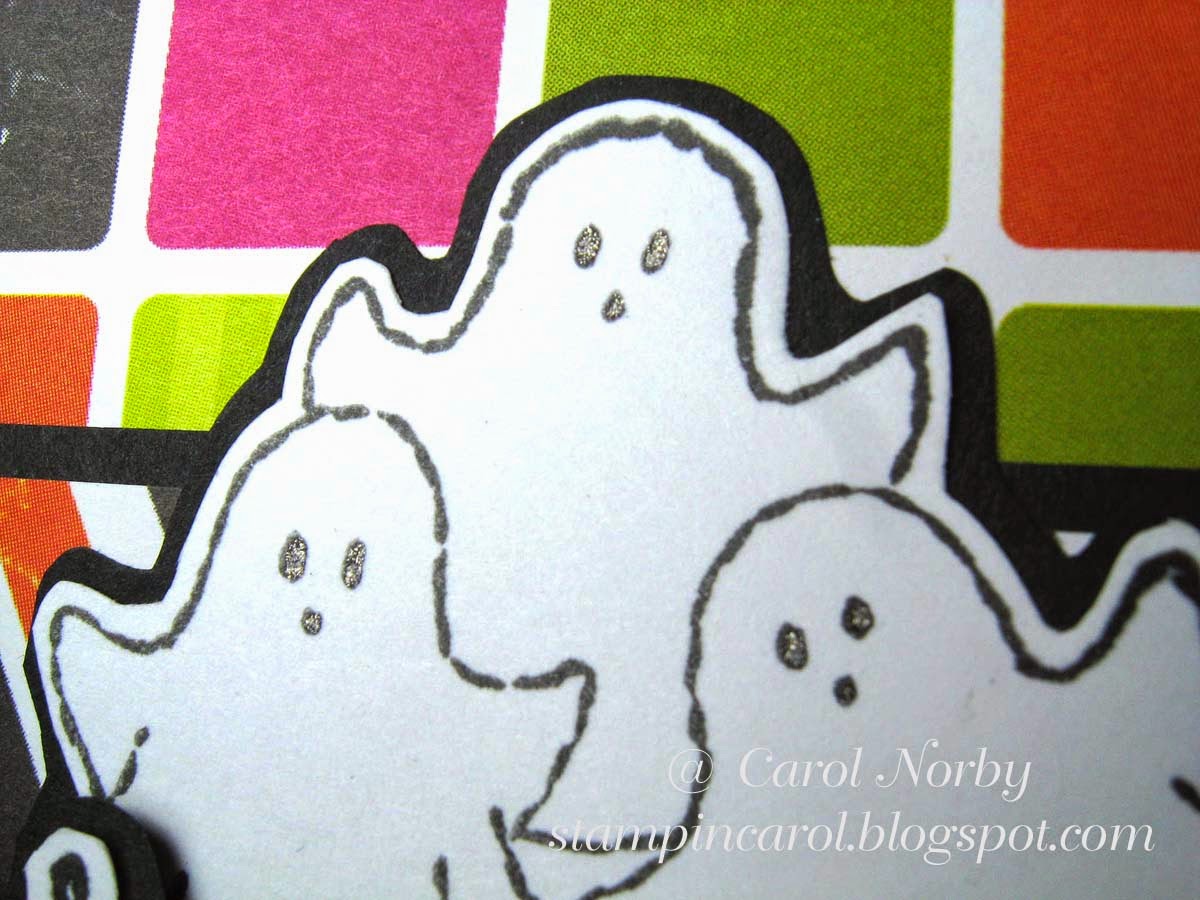
Here's my 4th card sample for my class "Assorted Christmas Fun" class now scheduled for Nov. 13.  I seen this snowman on a card I pinned on Pinterest but again, only the snowman resembles the card.  I rarely CASE a card as I seldom have the same stamps, punches, paper, etc.


I used a die by Impression Obsession as the store where I'm teaching can still get this set of dies and I have to use what the store can sell.  Yeah, makes sense but sometimes I use something then find out it's no longer available and I have to change my card, directions, and photos.  I do a bunch of research prior to the actual construction of the cards to be sure what I can use.


Now as to the Baked Pizza Mac.  I tried a new recipe last weekend from my Kraft Friends and Family magazine and it turned out real good!  I gave you a link to it on Kraft Foods if you are interested.

So now, please pop over to the Stamping Ground and enjoy a world tour of desks!  This weekend we're heading to a suburb of Phoenix, AZ for a mini family reunion on my mom's side. I'm sure there'll be some great memories of her shared. Hope you all have a great week and weekend!

Monday, October 13, 2014

A Reindeer with Ornaments

I spent the last few days finishing up the card samples, supply list, and directions for my proposed November class.  The meeting for the Nov. classes is this afternoon and I'm ready!!  I'm still working on the kits for my "Down in the Pumpkin Patch" class on Thursday, I need a couple more pieces of paper to finish.  But here is card 3 of 4 (the previous 2 posts have the first 2).


I decided since this reindeer was too large to use on the Flip-It type card that I had to do an A2 card.  I used a Spellbinder die set and colored with Copics.  The paper is from Bella Blvd. The reindeer is from I.O.


I used the Clear Wink of Stella brush on the ornaments and nose for a bit of bling.  I'm thinking this card is a bit busy with all the patterns but I think it works ok.  Any thoughts?  The red stripe design is the back side of the reindeer print. The final card will post on Wednesday.

Friday, October 10, 2014

Flipping Some More

I have one more Flip-It card to show you.  This is to be part of my November proposed class and the 2 of 4 cards I need to make.  I think I'll only do 2 Flip-It cards for the class and 2 regular A2 cards as the other stamps I'm using are a bit too big for the flip part.


The cute little penguins are by Stampendous.  I'm still using Bella Blvd. paper along with Bazzil.


I was trying to match the stamped penguins to the ones in the border but my choices were limited to what the store can purchase.  I'm still waiting on a snowman which is on back order.  I think I'll have to do something different and maybe use some punches instead of a stamped image.  Oh well.

Wednesday, October 8, 2014

I'm Flipping on My Desk

Yep, I've been making Flip-It cards on my desk.  Catchy title, ya think?  Today is Wednesday again.  A great day as we're supposed to get some rain but to cloudy to see the Blood Moon.  Oh well.  If you are curious as to why I'm showing you my desk please click on the WOYWW (What's On Your Workdesk Wednesday) logo in the sidebar and it's supposed to open a new window to the Stamping Ground blog's explanation.  I love seeing other crafters desks and I get the opportunity to show you mine!


I just finished a card similar to the one I'm showing you today.  These 2 cards are 2 of 4 card samples for a proposed class in November at the AZ Scrapbooking store in Green Valley, AZ.  You can see some of the paper I'm using on the far left and the plastic envy holding the Sizzix Square Flip-Its dies.  Then clear rhinestones in the little box just to the left of my scrap paper covered Scor-Pal.  There are scissors, my ATG adhesive gun, foam mounting tape and all kinds of stuff.  I just recently replaced the bulb in my OTT light and it's being a bit obstinate in lighting when turned on but it gets there.  I am showing you my desk chair covered with my die-holding case covered with a pencil box of kits and stamps for my "Down at the Pumpkin Patch" class kits.  Usually everything is on my desk but it overflowed this time.


This is the 2nd card I made using this die set.  If you want to see my snowflake one you'll have to go back one post.  I was excited to get my hands on this die as I ordered a similar one earlier this year but kept getting a back order notice.  I found this one at Michaels craft store last Friday and did have my 40% off coupon so got it for about $20.00.


Here is the card "flipped".  When closed like the first picture it is 4 1/4" wide by 5 1/2" high, standard A2 size.  When open it's 5 3/4" wide.  Since this will be the first card of the 4 in the class I start with real easy.


And yes, there is bling.  I added some Stardust Clear Gel pen to the small tree on the front.  Pretty cool! I'm using paper from Bella Blvd. from their Christmas Cheer collection.

So now pop over to the Stamping Ground and check out the other desks.  I'll be staying home today so I hope to visit many.  Be prepared to spend some time!

Monday, October 6, 2014

Flipping Snowflakes

Did you enjoy the many great projects for World Card Making Day Saturday?  I sure had fun looking around!

Last week I got my hands on a Sizzix Flip-Its Square Die set at 40% off at Michaels.  I've been trying to get one of these die sets but when I ordered they were on back order.  I have been trying since January so that tells me they're very popular.  This square die set was the only Flip-Its at Michaels and I did have my coupon so it came home with me.


It was difficult to get the card to stay closed to get this picture.  The center snowflake is by a Spellbinder die and the smaller ones are from a punch.  I used a lot of clear rhinestones so there is a LOT of bling!


Now the card is part way open. You can see it starting to "flip".


Now it's almost totally flipped.


Here is the front snowflake with all the bling.  Yeah, I was getting a bit carried away.


And the inside text.  This stamped image is from a CTMH set called "Flakey Friends".  This is a great snowman set!  Now I'm off to make more of these!  Stay tuned!

Saturday, October 4, 2014

Happy World Card Making Day!


Today is World Card Making Day. It's so cool that "us" card makers have a "global" holiday!   I'm not involved in any blog tours but did make a card to answer 2 challenges, one by Freshly Made Sketches  and one by Red Rubber Inspirationals.  Freshly Made Sketches had an interesting sketch (sketch #156), as usual, and RRI wanted cute and spooky.  I have a few Halloween stamps and used one of my favorites that was from The Angel Co. After I made this card I did find a couple Halloween stamp sets I have by Red Rubber Designs but I wasn't going to take the time do make this sketch again.


I like how this turned out and probably will be sending it to one of our kids or grandkids.  We don't celebrate Halloween and much prefer Thanksgiving but the all the kids do enjoy this holiday.


I was trying to get a pic of the shiny eyes and mouths from using my Black Stardust Gel pen on them.  You can see a bit of the shine.

I hope you are enjoying all the blog hops.  I will be checking the blogs I follow to see all the fun projects.  Hope you have a great day!