Saturday, May 31, 2014

Sorry, a Sympathy Card

Hubby asked me to make him a sympathy card for a co-worker's girlfriend whose mother passed away last week.  Of course!  Sandra is very nice and my heart breaks for her so making a card for her is the least I can do.


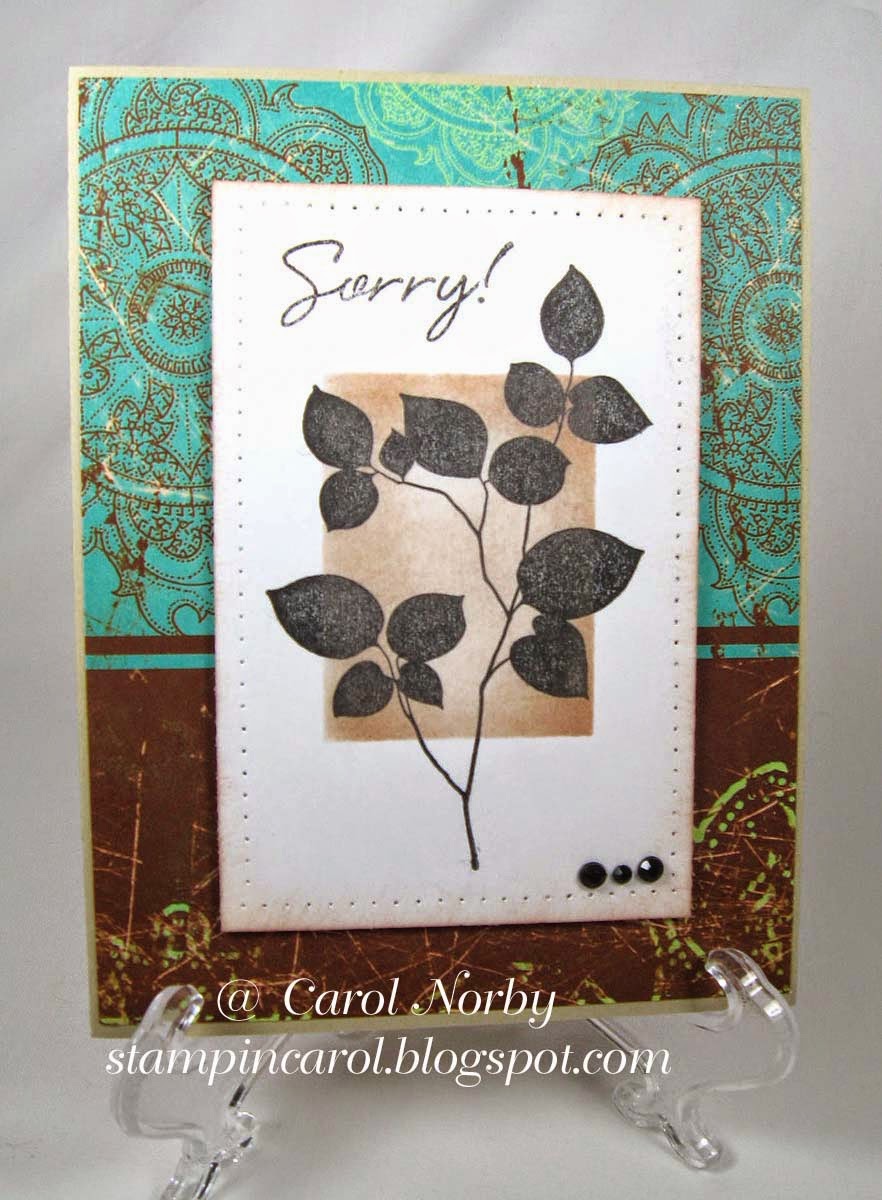
The leaves are from a soon-to-be discontinued set by A|Muse Studios called "Beautiful Botanicals 2".  The text is from a set by Hero Arts called "Say It All." And the background paper is from a pad by Red Rubber Designs call "Rustic Chic". ( If you are interested Red Rubber Designs has a great sale going on...  I'm a satisfied customer.)  I cut a little "frame" from some scrap paper to make the shadow using a sponge and an ink pad that coordinated the the paper.


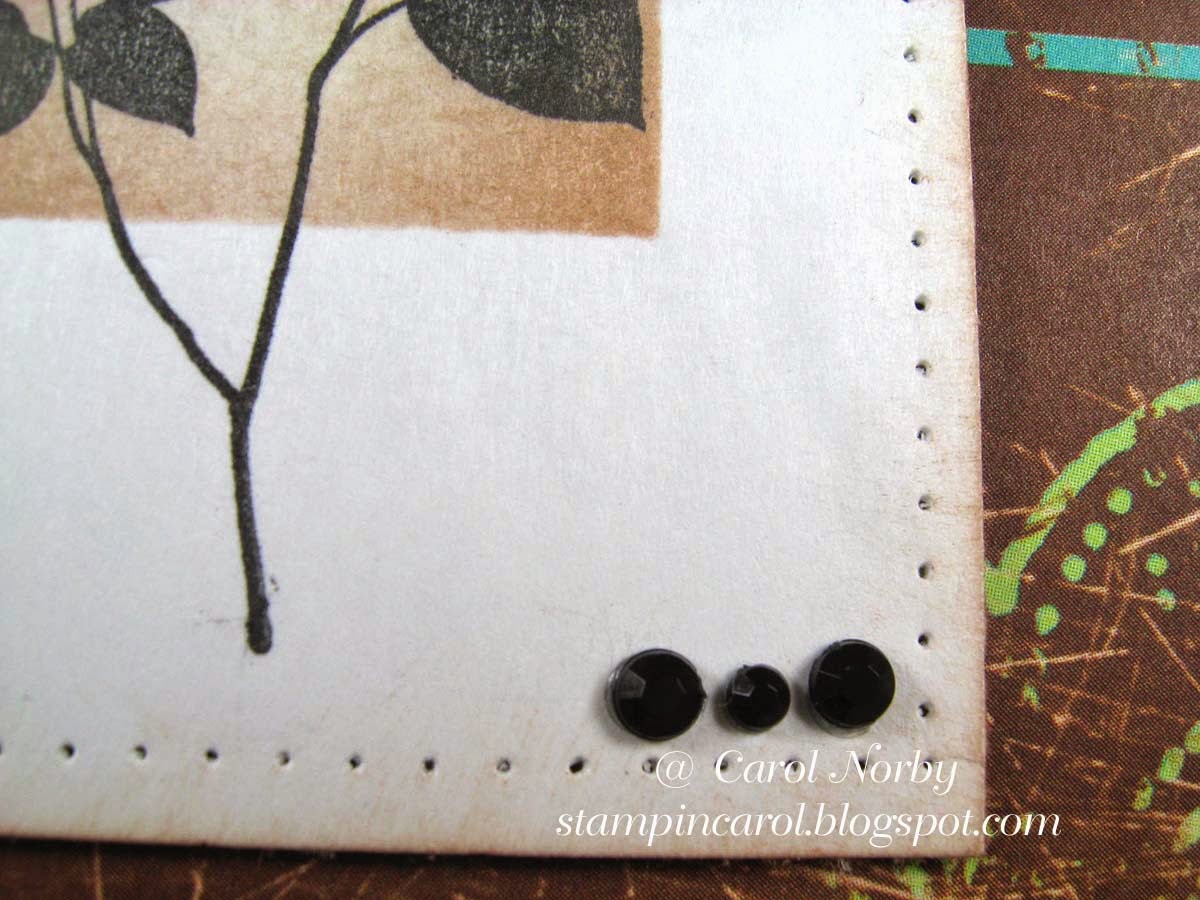
I used my Tim Holtz centering ruler to poke the holes and added the 3 black gems to balance out the image piece.  I like how this turned out so now I just have to add something inside.  I'm sure Sandra will appreciate it.

I've been looking at how to add a Pinterest button to my photos but I'm a big chicken.  I do have a "Pin It" button on my tool bar so I can pin directly from others for future reference.  I'll keep trying to get this figured out but, who knows....

Thursday, May 29, 2014

Sea Salt Caramel Rice Krispie Bars

I posted a pic yesterday of these fabulous bars!    Our church secretary told me they were so good they were almost evil!  She's so funny and I love her.  Anyway, here's the recipe as I received it from a Bob Martin of Green Valley, AZ.

Sea Salt Caramel Rice Krispie Bars

For the Caramel sauce:
1 (14 oz) bag of caramels unwrapped (about 50)
1 (14 oz) can sweetened condensed milk
 1/4 cup unsalted butter

For the Squares:          
1/4 cup unsalted butter
1 (10.5 oz) bag miniature marshmallows
1 1/2 teaspoon vanilla extract
3 teaspoons sea salt flakes
8 cups Rice Krispie cereal

Make the Sauce:
Stir the ingredients in a medium saucepan over medium-low heat until melted and smooth.
Remove from heat.

Make the Squares:
Line a 13" x 9" baking pan with non-stick foil, extending 2" beyond the edges.
In a 6 quart pot, melt the butter over medium-low heat.
Add marshmallows and stir with a rubber spatula until almost melted.
Stir in vanilla, 1 teaspoon of the sea salt, and 1 cup of the caramel sauce.
(Set aside the rest of the caramel sauce for later use.)
Continue to stir until the mixture is blended and smooth.
Remove from heat.
Stir in the cereal until it's evenly coated with the marshmallow mixture.
Press mixture into the pan in an even layer and cool completely.
Reheat the remaining sauce until soft enough to spread over the cooled cereal, then spread evenly.
Sprinkle with the remaining 2 teaspoons of sea salt.
Cool, then remove from the pan and peel off the foil.
Cut into approx. 24 squares.
Store in an airtight container.

A Freshly Made Christmas Card

Yesterday while I was blog surfing (blurfing) I checked out 52 {Christmas} Card Throwdown and Freshly Made Sketches.  I do like their challenges and I combined these 2 challenges into 1 card.


For the 52 {Chrismas} Card Throwdown one had to use blue, something old, something new, and something borrowed... or at least 2 of these.  I managed 3...  blue, old, and new.  The paper is old to me, I've had it about a year, and it's blue but is showing up a bit more green or turquoise in the pic.  And the stamp is new, never been inked, I've been waiting for the right sketch to use it.  It's by Unity and is a Phyllis Harris design (LOVE her stuff!).  The layout is from Freshly Made Sketches, sketch #138.  Nice and clean which is my favorite style.


Here you can see a close up of the blueish green ribbon (sure looks way more green here), blue button, and pale blue pearl with white scrappers floss.  I tried to get colors from the background paper.


I colored the image with Copics then lightly sponged some blueish green ink over it to kinda age it.  The image is quite large in reality but I only wanted the center with baby Jesus so the Spellbinder die was used to create a smaller focal point.   The pattern paper is by Bo Bunny.

Now pop on over to Freshly Made Sketches and 52 {Christmas} Card Throwdown and check out the great cards others made for these challenges!

This is my 2nd post today.  Check out my delicious recipe I just posted.  I got RAVE reviews at church on it!

Wednesday, May 28, 2014

It's WOYWW's 5th Anniversary!


 Oh my gosh!  Julia has had this fabulous desker blog tour going on for 5 years!!  Many in the WOYWW group are doing an ATC swap and there was even a special crop last Saturday, but in England.  As for me, I can only show you my desk.  Yep, I'm not doing anything special EXCEPT for getting ready for our youngest son to arrive tomorrow from Wyoming for a 3 day visit and to see his grandma (on Hospice care) for the last time.


Not a lot going on here.  I have been working on my "Christmas in July" class which will be about gift card holders.  Here you can see 2 almost completed ones - a stocking and a mitten.  I still have at least 1 more to make and am debating a Christmas tree or a card.  Hmmmm....

And I did manage to get some cards done this past weekend along with cleaning and some treat making.


I seen a card similar to this over on Pinterest and decided to try it.  I used to do a lot of scoring on my cards back when I purchased my Scor-Pal but now that it is hidden under my kraft mat it's kinda like "out of site out of mind".


Here you can see the score lines a bit better.  The text on the label is from a set by Hero Arts called "Celebrate Everyday".  The words were all one line but I cut them apart to make them fit my label.
And my treat....


These are Sea Salt Caramel Rice Krispie bars.  There is a bit of a story behind them.  On the day I was helping dad take mom to the hospital this past time we stopped at Carl's Jr in Sahaurita, AZ.  This is a fast food place and we do like their burgers.  Anyway, I was telling dad about how I didn't much like their Sea Salt Caramel milk shakes and the guy behind us in the line said that I would just LOVE these bars!  Well, we chatted and he gave me his card with his email addy and told me to write him for the recipe.  I did, got the recipe and here they are.  I took them to church last Sunday evening for a "snack-luck" (small version of a pot luck dinner) and they were a hit! I had about 5 bars left over.  I'll add the link to the recipe on my next WOYWW post.

So now pop over to the Stamping Ground and check out all the fabulous desks!  I celebrated this auspicious occasion by having a pedicure (I have beautiful iridescent turquoise polish on my toes) and getting my hair trimmed.  What are you doing?

Monday, May 26, 2014

Happy Memorial Day!

Today is a special day!  Today we celebrate our military servicemen and women who passed away while in service.  This goes way back to the Civil War and was called Decoration Day.  It was changed early 20th century to honor all military people who died.  Wikipedia has some info if you want to learn more.

I made a card to honor today and our brave men and women throughout the history of the United States.


The paper is by Pebbles called "Let Freedom Ring".  The stamped flag image is an ancient one from The Angel Company and I do not remember it's name.  The text sticker is from a coordinating pack to the paper.


I colored the flag with Copic markers and added some clear Wink of Stella glitter to the star.   The brush also darkened the star which I don't like, makes it look colored like the shadows I added.  Bummer. 

Today hubby has the day off and he's busy working on rebuilding a hay baler for the company he worked for a couple years ago. Me, I'm cleaning the house and preparing for our youngest son's visit from Wyoming the end of the week.  I hope you get the opportunity to honor our fallen soldiers in some way today. 

Saturday, May 24, 2014

A Pink Peony

I got to stamp a bit yesterday even though I had to run to Tucson, AZ and have lunch with hubby.  I even stopped and purchased 3 relatively cheap shirts for him to work in (they'll get full of grease and oil) and stopped by our bank.  Hopefully today I'll get a couple more made after I vacuum the carpets and mop the kitchen and dining area, and catch up on some Bible reading.


I pinned a card very similar to this on Splitcoast Stampers and here's the link.  The stamps are from a set called Dotted Peony that I purchased from The Angel Company but I think they were designed by Nina Brackett.  Not sure and can't remember.  The pretty pink background paper is from a pad of paper called Southern Chicken Dumpling Soup by Jillibean Soup. I used the Beaded Circle die from Spellbinders to the "halo" behind the flower.


I colored the flower with Copic markers and added some clear Wink of Stella brush strokes to the flower center.  Oh, there's a small paper posy by the text.  This will probably be used as a thank you card for my secret sister at church for the great coffee gift card she gave me for Mother's Day.

Thursday, May 22, 2014

A Freshly Made Sketch with Pearls

I took a bit of time today to make a card.  Mom wants a thank you card to send to the ladies at Curves for the nice Thinking of You card they sent her.  And, to kill 2 (or 3) birds so to say, I used this weeks sketch from Freshly Made Sketches and the challenge on Red Rubber Inspirationals.


This layout from FMS is from their sketch # 137 (FMS 137) posted yesterday, the 21st.  I used stamps, text and butterflies, from a Red Rubber Designs set called Happily Grateful.  There is also a pink stamped butterfly under the butterfly die cut.  All the paper is from the Maggie collection.  The die cut butterfly is by Spellbinders.  I used my new Spellbinders Tool 'n One and it worked pretty good in getting most of the little pieces out of the die cut but not all.  The paper piercer end finished off the job.


For the Red Rubber Inspirationals challenge # 121 I had to use Pearls.  Here's a close up of the ones I used.  I think this turned out nicely and I'm sure my mom will love it.  I still need to make a Thank You card for my secret sister in church so I'll be working on that tomorrow.

Wednesday, May 21, 2014

Another Desk View, a Lighthouse, and a Camper

I have to admit that since mom has been placed on Hospice care my stamping has been almost non-existent.  I've only been stamping when I absolutely must but hope to get some done this weekend.  I did want to take part in the weekly hump day desk blog hop so hustled to get a photo taken.  Julia, over at the Stamping Ground, is responsible for this weekly event and next week is the 5th anniversary of this fun universal blog tour!  This week my desk is a horrible mess as mom wanted a thank you card and I have my card boxes on my desk as I searched for a card that would work. 


Yep, my red Cricut and paper trimmers, then 2 boxes of cards.  Many are not complete as I don't want to finish some until I'm ready to use them and can add various words for the reason they're needed.  Then, further right, my red ATG adhesive gun, OTT light and paper.  This time you get to see the stuff against the wall. Yep, a real mess but I know what's in it!  But in just a couple minutes time the boxes will put away and the desk ready for me to start something. (This pic was taken Tuesday evening as I'm driving my dad to see his skin cancer doctor at Odark thirty this morning.)


Since I haven't been stamping I wanted to show you a cool paper lighthouse that Debi, the owner of the AZ Scrapbooking store made using SVG cuts.  Now it is white.  But the florescent lights cast a yellow glow which really messes with paper colors.  This lighthouse stands about 18" tall.  The windows are made with vellum and the waves at the bottom are really cool!  But wait..  I have a photo of a camper that Diane, a customer, made! And if you look back through my posts to last Saturday or so you'll see tea sets, golf bags, and more campers.


Diane has been getting orders for these and is now down to taking about 1 1/2 hours to make one.  I watched her a bit yesterday as I was teaching a class and she can just whip these out!  She did say her first took 1 1/2 days.  I'm considering purchasing either a Silhouette and SCAL3 or the Sizzix Eclips to start getting in on the fun.  Does anyone have a preference for one of these and why?  I'd love to hear what you have to say.

And now, hop on over to the Stamping Ground and get in on the hop.  There's some great ideas and photos for your enjoyment!  Grab your drink and hang on for a fun ride!


Monday, May 19, 2014

Howdy Pardner

Our great grandson ....  yes, I said great grandson ...  will be turning 4 soon.  He's such a little cutie and his folks, our granddaughter and her hubby, are quite the cowboy and cowgirl.  Sky trains ranch horses and works on a cattle ranch and Christen is a competitive barrel racer and takes care of their small cattle herd. So Ryan has horses and ranch life in his blood.  But he is having a shark themed birthday party (he has a thing for sharks) and I have already ordered his shark themed toys which he should have about a week before his birthday.  Unfortunately I don't have any shark image stamps but have oodles of cowboys.  And as I recently seen a you-tube video of him playing with a rope I just had to make a cowboy card for him.  The cowboy and howdy are from an old TAC set called "Howdy".


I also used an old TAC paper collection called Winchester.


There is no bling but I did use some solid twine from The Twinery and colored with Copics.  A relatively simple and fast card.


My last post I showed you this card that I was going to use for my shoebox project for the TAC angel reunion June 6 and 7.  Here's my box of the sample card and 29 kits in my shoebox.  In the back of the box are pop dots and rhinestones along with extra flowers and flower centers.  I just need to remember a couple rolls of double-stick tape and a black ink pad.  I'm so looking forward to seeing old friends that I haven't seen in at least 3 years.

Friday, May 16, 2014

Cool Paper Crafts And A Card

Last Saturday I attended a Customer Appreciation Tea at the AZ Scrapbooking store in Green Valley, AZ.  I posted many pictures of the paper tea sets and the wonderful ladies who attended.  While I was there (as an instructor) I took pictures of a fabulous little paper camper and some golf bags.  What, you say??  Yep!


This is "Poor Little". You may want to click on the photo to get a better look.  Debi (store owner) made this with a pattern from SVG Cuts on her Cricut.  Isn't it just amazing!!


The front view....


And the back view.  I am just so impressed!!


And the golf bags!  They will hold 2 golf balls and 2 or 3 tees.  Again, from a pattern from SVG. I may have to order some of these bags for Christmas gifts...

I've been preparing from the "Ex-Angel Reunion" in Kansas City June 6.  All of us attending are required to bring a shoebox project and I finally got my sample completed.  I'm doing my final cutting of the leaves.  Tried to do them on my Cricut but couldn't get a good cut so out came my dies from Heartfelt Creations.


The pink flowers were cut on the Cricut but the labels and leaves are from dies.  And, of course, the Dotted Swiss embossing folder.  The stamped image are from TAC many years ago.


I did use a pop dot to raise the punched circle for the flower center.  I'm making 29 card kits and each will be in it's own baggie with some extra flowers and centers in a little container.

Wednesday, May 14, 2014

My Hump Day Desk and a New Tool

Do you know what day it is?  Hump Day!!  Wednesday!!  Desker Day!!  Oh my!


But this little guy isn't what you really wanted to see, is it?  I seen this at a yard sale and immediately grabbed my phone to take this picture just to use on this post.  But today is the day you get to see my desk and desks from all over the world.  Head desker, Julia, of the Stamping Ground, has done a phenomenal job of pulling us together for a world wide blog tour of desks.


My desk is busy.  I have just started making 30 card kits for a shoebox project for a special event.  I'll be going to Kansas City, KS for an "Angel" reunion get together in June.  There will be about 25 of us who were demonstrators for The Angel Co. getting together for 2 days to play and reminisce.  But enough of that, back to my desk.  You can see my red Cricut on the left and it will be getting a work out shortly as I'll have it cutting vines and flowers.  Center stage, my Big Shot.  I'm currently embossing 30 white pieces with the Dotted Swiss folder.  I don't have my sample card made yet but I will shortly. I already have the 30 white folded card bases and the 30 green base layers cut.  This is step 3 to me.  There is a package of stamps under the cutting platform that I recently purchased and you can't see the new tool that I ordered a couple months ago and I got it Saturday.  Want to see it?


This is the new "Tool-in-One" by Spellbinders.  The brush is supposed to help get rid of the little pesky pieces in a die cut or on a die.  There is a paper piercer on the other end (has protective cover so I won't poke myself) and a little flat thing (looks like a blue shovel) to help release paper from the die.  Unfortunately I'm not cutting any intricate dies to try this baby out but maybe next week.  I watched a couple videos on this tool and promptly put in my order.  I'll let you know what I think of it when I try it.

So now head over to the Stamping Ground and take a look-see.  There's some fabulous projects and great organization ideas along the way!

I hope to get a bunch of visiting done this morning.  I spent all day yesterday at the hospital with my mom as we talked with doctors about her colon cancer.  She is now starting Hospice care so it was an emotional roller coaster.  If you are so inclined please say a prayer for her and dad as they work through this major life change.  Thanks.

Monday, May 12, 2014

A Fun Tea Party

Saturday I was privileged to take part (and teach) in a tea party at AZ Scrapbooking.  Unfortunately I did not dress up (and wearing a dress was not even a thought since I spent the whole day before in E.R. with my mom).  But it was great fun and there was a contest held for best hat and best paper tea set.  I just had to take pics!


Here's a pic of all the tea sets in the contest.  I did get pictures of each one but I'll show you my favorites.  Unfortunately I don't remember who won.


This one uses Graphic 45 paper with a Halloween theme.  There is cob webs on the cups and pot and the details are fabulous!


A steam-punk themed pot.  It had little gear cogs all over it with one for the lid handle.


The cascading flowers were a fabulous touch!  They are also on the corners of the tray!  There must be hundreds of punched flowers!


This one is not of those in the contest but I loved the bird in the nest in the pot.  And there is a butterfly flitting above the handle!


Here's the ladies with their creations.  They are just so talented!


Susan made her own hat from paper.  The top section is a tea cup!  She is uber talented and her classes are highly liked!

Hoped you enjoyed seeing our tea party.  Now I'm off to work and hopefully get something made this afternoon!