Friday, September 28, 2018

Happy Friendsgiving

As we are creeping up on Thanksgiving we need to remember to give thanks for our friends!  We have a great stamp that does just that!


I started this card by looking through my print card stocks but couldn't find anything that was subtle yet had fall colors so I started looking through my stencils. Yep, that worked! (I did make a FB Live video as I made this card and have uploaded it to my YouTube channel, Carol Norby. Link here.) Anyway, I used our cool Nature Collage stencil, Clear Pigment Ink, Pineapple Smoothie PanPastel, and a large Dauber Dowel  and pads to make the background on Pineapple Smoothie card stock before added some splatters of Dark Roast and Citrus Cooler Silks.


I stamped the 3 leaves from our Zen Leaves Bundle with Clear Pigment ink then used a variety of PanPastel colors before blending with our new Rose Gold PanPastel.  Only 1 did not get too much Rose Gold! Oh well, they all have a great shimmer. I also used Haystack and Butter Cream card stocks, Gather Together AT stamp set, Scallop Die Set, Hazelnut Blend Ink, Meadow Pearls, Easy Glide Runner, Foam Squares, and my Platinum machine.

I have a class to teach this morning, my Halloween for the Young at Heart. I'm trying hard to get back into the groove from our vacation but not succeeding a lot!  Oh well!  Life is an adventure!

StampinCarol

Wednesday, September 26, 2018

Desker Wednesday and a Senior Card

aIt's been one of those week.  I'm not normally a drinking person but I've had a few Dr. Pepper sodas this week.  I won't tell you what all has happened but yesterday I did get some good news about a sensor in my car.  Anyway, today is the day I share, along with a bunch of others, a look at my desk in whatever state it is when I grab my camera.  And this view is part of a desker tour de desks put together by head desker, Julia at the Stamping Ground.


I took this picture yesterday mid afternoon as I was working on finishing the last of the kits I need for Friday's "Halloween for the Young at Heart" class.  We'll be making 3 cards and a little treat box.  This is the treat box on my desk.  It's black with a dark orange decorated belly band.

So, there is a pile of stuff on the far left that needs to be put away.  You can see my punch (green and white) just to the front right of my covered Scan N Cut.  Then the start of the kits and my paper trimmer.  To the right is the sample in a plastic box and my Platinum 6 machine.  The back half of my desk never seems to change but you can click on the picture and enlarge it to look.

My other project is a birthday card for our pastor. Tonight we'll be celebrating his 70th birthday.  His wife said it's his 2nd Over the Hill birthday so I went with a fun card.  I used a page from our phone book yellow pages on Assisted Living places.  Oh yeah, I do have a weird sense of humor.


I've had the stamps for AGES! I have no idea where they're from.  I did add the Happy Birthday with a white pen and we'll add our signatures before I put this in an envelope. I think he'll have a good laugh when he sees this.

Now I'm done with my post and I hope you got a laugh from the card.  Please head over to the Stamping Ground and check out the other desks involved in this fun desker get together!

StampinCarol

Monday, September 24, 2018

Booooo Treat Box

Here's another project I'll be teaching on Friday.  I had fun making this cute little treat box with a belly band to hold it closed. 


I wanted something different than a card and we have so many cute box dies.  This will hold some Hershey nuggets or similar goodies.


The top does not tuck in to the box so the belly band is required.


Products used:
Card stocks: Black Licorice, Citrus Cooler, Pretty Pansy, Deep Lilac, and Tangerine Fusion
Dies: Treat Box,  Snapshot Frames, Journey Circles, and Circle Around
Silk: Sparkle
Other: Special Celebrations Sequins
Adhesives: Craft Glue, White Liner Tape, Foam Squares, and Glue Dots
Tools: Platinum machine

I usually send something like to to some of our kids for Halloween.  I do cute only, I don't like scary and for Halloween we put on a big to do (The Blast) at church with games, candy, toys, and food to give the local kids a safe place to play.

What do you do for Halloween?

StampinCarol

Friday, September 21, 2018

Ghost in the Window

My Halloween Class is next week so I've started working on the kits I need but realized I haven't shared any of the projects with you!  Now that I have my directions all printed out I have all the details right in front of me!  Here's a relatively easy card that we'll be making.


I played with a relatively new die and some old (but still current) stamps.

Stamps: Party Ghost Bundle and Solid Bet stamps
Card stocks: Whip Cream, Black Licorice, and Fall Fest  Prints (retired but try Fall-O-Ween Prints!)
Dies: Window View, Snapshot Frames, and Outline Bet
Ink: Black Licorice
Adhesives: Easy Glide Runner and Foam Squares
Tools: Platinum machine

The bats are from the Snapshot Frames die set.
We have a great embossing folder that you could use on Black Licorice then swipe with Whip Cream ink.  It's called Spooky Bold.

For some reason I don't have a close up but I would have liked to show you the bats, they are lightly embossed which is cool.

StampinCarol

Wednesday, September 19, 2018

My Desk and Our Trip

I have missed the last 3 What's On Your Workdesk Wednesdays as we were traveling.  I'll give you a list of some of the places we went after I share my desk from yesterday afternoon. And this view of my desk is part of a great get together of fellow crafters brought together by Julia at the Stamping Ground. I had just finished 2 card samples for my October class (yes, I have to get all 4 done THIS week with directions) so I can show them at my Sept. 28 class. On my desk I have some ideas to use on card # 3.  (Sorry, Julia, but this post is a bit photo heavy.)


So, far left.  My paper trimmer front and oodles of stuff (cards and such) sitting on top of my Scan N Cut, then baskets of odds and ends stamping stuff in baskets on shelves far back.  Middle... Stamps and papers sitting on my grid paper front. Then my red box of acrylic blocks, cleaning rags, assorted Liquid Colors and Silks in baskets the far back, assorted hand tools in desk organizers and washi tapes in their racks.  Far right, assorted paper, Ott light, and ink pads.

Ok, now as to our vacation.  We actually played along the trip by stopping at Meteor Crater and Winslow, AZ the first day.  We were awed by the crater and stood on the corner in Winslow. Remember the song by the Eagles, Take It Easy?  We did.


Next day we stood in 4 states, Utah, Arizona, Colorado, and New Mexico at the 4 Corners Monument.


From here we went to see my brother and his wife near Denver, CO and did some touristy stuff.
Next to Cheyenne, WY and seen our daughter and SIL for a few days. Had a great time, even went to the Terry Bison Ranch.  We fed the buffalo while riding a train!


Next to Lusk, WY and had lunch with my sister-by-choice and her boyfriend.  Miss her oodles.
On to stay at Sheriday, WY and over the Big Horn Mountains in north central Wyoming.


This was quite a climb up and down. Up to 8% grade going up and 10% going down.
Stopped to see our granddaughter, her hubby, and the youngest of our great grandsons.
On to Powell, WY.  We stayed a few days with our youngest son, his wife, and our grandson. We didn't do much but played a lot with our grandson!

Headed home Sept. 10 through Yellowstone Park, Jackson Hole and points south.  Here's my favorite scenery picture.


I think the Grand Tetons symbolize Wyoming the best. The trees were starting to change colors and snow will be falling on these majestic peaks very soon!
We drove through Monument Valley in northern Arizona but didn't stop as we spent about 4 hours there a couple years ago. Last stop, Flagstaff, AZ where we had dinner with my niece and her fiance (they were getting married 2 days later!) then home.   Now, I have oodles more pics but these give you an idea of some of the sights.

Now, please head over to the Stamping Ground and check out the links to other desks.  I'll be visiting off and on today as I have to take my dad and his wife to the airport as they're heading to Denver to stay with my brother for a few days.

StampinCarol
Monday, September 17, 2018

Happy Friendsgiving

Well, after being gone for 2 weeks on vacation I'm back!  Got home last Wednesday and got caught up with chores by Friday!  So.... I made a FB Live video making this card.


It's a simple card and was fun to make!  I used our new Piercing Template and Mat for the first time.


I hope the swirl gives the impression that the leaf is swirling on the breeze.

Products used:
Stamps: Gather Together ATS and Zen Leaves ATS (Bundle available)
Card Stocks: Pumpkin Bread, Oatmeal Cookie, and Whip Cream
Ink: Hazelnut Blend
Silks: Dark Roast and Citrus Cooler
Embellishments: Fashion Gold
Tools: Basics Piercing Template, Piercing Mat, Bloom Tool, Clearview Sheets, Details Pro Shears, Heat Gun, Paper Trimmer, Media Mister, Acrylic Block E, Acrylic Block K
Splashes: Citrus Cooler, Green Olive (retired), and Sweet Berry
Adhesives: Med. Foam Squares and Small Foam Squares

Here's my YouTube Video:


Do you have a special friend that you would like to send this card?

StampinCarol


Friday, September 14, 2018

Who Has The Fetti?

We have 4 fun confetti products that really spice up your project or shaker cards! 


These 2 fettis just sparkle so much!!  I've used them along with our Journey Glaze to make snowmen (the Clear Sparkle on the right,of course) or add to flower centers (Candy Apple).  We have more such as Lemon Grass, shades of green, but I just realized I don't have it!  Oh no!!


These 2 can be used with our Glaze but work so fun in shaker cards.  There is Star-Fetti on the right and Slice-Fetti on the right.  I was thinking of dumping some of the out but our on line pictures do a great job showing them.

If you go to my shopping cart then Accessories then Glitter & Sequins you can see all the fun bling we carry to add that special little extra to your projects.  I'll share some more of my favorite products some other time as today I'll be working on some other projects.

StampinCarol

Wednesday, September 12, 2018

Flowers and More

Have you checked out our beautiful flowers we have to embellish your projects?  You'll find them in the BIG catalog on pages 280 through 283 and on page 28 in our Good Life collection.   I don't have them all but what I have pictures of  I'll share.


Since I've started on my Christmas cards these 2 are great adds to your cards but they are kinda difficult to mail.  You may need bubble mailers or hand deliver.  These are also great for scrapbook pages. You'll find these on page 283 of our BIG catalog.  The gold are Golden Poinsettias and the red are Poinsettia Burst.  There are 6 to the packages and you do need adhesives to stick them down.


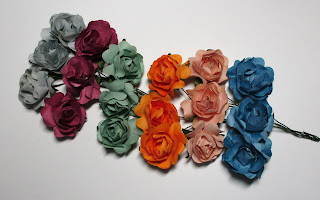
These are new and so my gosh how beautiful! They're very dimensional.  The 3 on the left are called Cottage Flowers and the 3 on the right, Meadow Flowers.


Look at the detail!! They're about 1/2" tall and 1 1/8" wide. The flowers do have "stems" if you need them and do require a good adhesive such as our Journey Craft Glue.

I hope you're enjoying these posts as I'll be getting home today from vacation and didn't get enough projects done in advance to share.  I'll show a few more of our cool products on Friday as that day I'll start playing again!

StampinCarol

Monday, September 10, 2018

Sequins, sequins, and more sequins!

I'm in love with our sequins and I know by looking in the catalog you don't really get a good look at the colors.  I'm hoping you can get a bit better look here and, if you need to enlarge, just click on the pictures.


These are our Special Celebrations, Blue Skies, and Holiday Elements.  I used the Holiday Elements on many of my Christmas cards.  As you can see the white and silver ones look like snowflakes! The jars are pretty good sized and I've had these for a couple years.  I've barely made a dent in the amount of sequins in these.


Here are our Gold Friendship, Sunrise Mix, and Bloom Time sequins.  The Gold and Sunrise are new to our catalog and the jars are just a bit smaller than what we started with but there are still LOTS of sequins in the jars.

I didn't get a picture of our Pink World sequins but they are shades of Pink and just so cute!

My next post I'll share some of our cool flowers that we carry so come back Wednesday!

StampinCarol

Friday, September 7, 2018

Merry Christmas Hoop Ornament

I really like our DIY Hoops and this is my 4th hoop I've used out of the package of 6.  These fun embellishments are great on cards, too, but I have yet to use them on a card.  Maybe soon....


This is the largest of the 3 sizes and is about 4 3/8" across. I used the Merry Everything stamp set and a few other great products.


Here you can see some of the dimension of the ornament.

Stamp set: Merry Everything
DIY: DIY Hoops
Card Stocks: Pool Play, Oatmeal Cookie, Lemon Grass, Buttercream, and Mirror Gold
Embossing Folder: Yummy Dots
Silk: Sparkle
Inks: Dark Roast, Kiwi Slice, and Cranberry Bliss
Embellishments: Fashion Gold and Natural Thread
Adhesives: Journey Craft Glue, Easy Glide Runner, and Foam Squares
Tools: Details Pro Shears

If I don't start now I won't have stuff done by Thanksgiving as I usually mail out 4 packages, 3 to WY and 1 to CA.  Too many times I had to hustle way too much to be ready.  I usually send gift cards as I rarely know what family want but I do like to really dress up the cards for the personal touch.

StampinCarol

Wednesday, September 5, 2018

Santa Hoop Ornaments

I wanted to use the last 2 hoops from the DIY Hoops package of 6 and decided to use a stamp set that I haven't used yet (oh my gosh!).  These came out a bit different and I like how they turned out.


 They're just over 2 1/4" across.  I embossed the back piece and used Foam Squares to adhere my Santas.


I changed up the embellishments to get different looks. I tried to color Santa's hat with a red colored pencil but it didn't show up.

Stamps: Holiday Clips
Card Stock: Lemon Grass and Whip Cream
Embossing Folder: Cozy Knit
Colored Pencils: Color Burst
Other: Candy Apple Twine and Journey Thread Silver
Embellishments: Journey Sparkle Cuts and Fashion Silver
Adhesives: Journey Craft Glue, Journey Glaze, and Foam Squares med.
Tools: Details Pro Shears

Wouldn't these look cute on a Christmas gift?  You and add a label to the back with the To and From

StampinCarol

Monday, September 3, 2018

A Mystery Item Card

Last Saturday was our monthly SALSA meeting (Stampers At Large, Stamping Away) and I took part in the Mystery Item challenge.  We got a strip of crochet ribbon with buttons attached. I hemmed and hawed and had an ah ha moment!  If I would run some of our twine through the top and pull tight I could make a flower!  So I set out to give it a try.


After making the ribbon into a circle I glued a die cut circle to the back to make it sturdy.  Then I used our Scallop Circle dies to make the base and embossed it.  I glued the ribbon to the scallop then, using glue dots of various sizes adhered down the buttons.


I added the flower center and a button from my sewing stash.  I also ran the envelope through the embossing folder as we have to supply a decorated envelope.

Card Stocks: Sweet Berry, Summer Days, and RSVP Prints
Dies: Journey Scallops, Star Burst Bloom Die Set, and Circle Around Die Set
Embossing Folder: Petals Wall
Other: Candy Apple Twine, and a pink button from sewing box
Adhesives: Journey Glue, Easy Glide Runner, and assorted glue dots (not FSJ)
Tools: Platinum 6 machine

What do you think of my card?  Did I come up with something different?  What would you have done?

StampinCarol