I made my weekly Wednesday FB Live video yesterday and showed this card
before making one like it. I really don't know what this is called but it is
an Easel and it kinda has double legs. Maybe you can tell me. I also
have some step by step photos after the card photos with measurements but
check out my video. It's also on YouTube dated yesterday. The link is in the
sidebar.
(This post contains affiliate links. When you shop through my links I may receive a small commission at NO cost to you! Thanks for your support!)
From this view you're not sure what I'm talking about but you can see that this card stands up! And since I need an anniversary card that is what this became though it looks more like a birthday card. I used a print paper pack from Fun Stampers Journey that I've had for a long time called Yummy Prints. This collection was release in January 2015 when I joined as a demonstrator. I even have an umbrella with cherries which matches one of the papers. Anyway, I picked my base color and inks to match the prints I used.
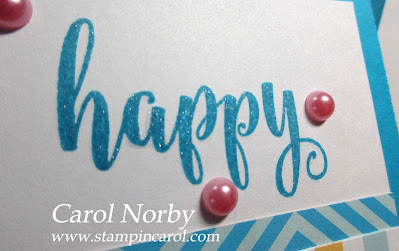
Here you can see the double legs. This card will fold flat but since I added the pearls it will need some padding and extra postage. The words on my top flap are from a clear stamp set I received from Spellbinders as a gift called Happy Sentiments.
I used my Clear Wink of Stella brush on the word as I wanted it to pop more.
I cut a cupcake from a sheet in the paper pack and used the Clear Wink of Stella brush on it, too. This circle is adhered with foam tape just on the bottom half making sure my sentiment could easily be seen. I played with this a bit making sure how I wanted it to work.
Inside I stamped a sentiment on a piece of card stock large enough that we could add a little message and sign.
The base of this card is very easy and here's some pictures to get you started.
The base requires 2 pieces of card stock. One is 4 1/2" x 11" scored at 2 3/4" and 5 1/2". I wanted you to see the directions of the folds in this. The second piece is 3 1/2" x 9" and scored at 4 1/2".
This is where and how you attach the 2nd piece. I'm not sure if I did a good job showing you here but my video is better.
From here you start decorating. The 1 card I seen
on Pinterest had something on every panel and a gift
card holder on the back of the top flap. Cool
idea.
Do you enjoy making fun fold cards? I have oodles of videos of the making of so many! Check out my channel.
Stampin Carol
The secret of the Lord is with those who fear Him, and will will show them His covenant. Psalm 25:14


No comments:
Post a Comment