
Recently I learned how to make a Twist and Fold card and I just had to share this with you!
(This post contains affiliate links. When you shop through my links {most are at the end of my post} I may receive a small commission at NO cost to you! Thanks for your support!)
I also made a video yesterday showing how to make this style of fun fold card but I have directions here, too.

This is my card front. And, after a try this card became easy! I started with a piece of card stock 5" x 11".

This is the template. But.... I found it easier to only do the point to point score at this time. You can do the center (yes, it will be the center of the card) fold later.

So this is how my card looked like with just the point to point score... now fold.

Next I used my score board and put the long straight edge against the top fence and scored at 6".

I did make sure before I folded that there would be a pocket on the cover and one on the inside right.

This is what your card should look like at this point when folded.
Now we start decorating.

You seen the green layer on my card front. I laid 1/2 of my card (basically the inside right side) on my green and traced. After I cut it out I cut 1/8" off EACH side, yep, all 4 sides. I slid this funky shaped piece into the front pocket to check the fit and make sure I had an edge on the top 2 edges. Once I had it how I wanted it I adhered it in the pocket. I did show on my video that you can add another layer if desired. I then glued or adhered the pocket closed as I didn't need it.
Now for the triangular pieces.

For my green layers I cut a piece of green 2 1/2" x 5 3/4" then cut on the diagonal as shown. I decided I wanted a print layer so I cut a piece of print 2 3/8" x 5 1/2" and cut it on the same diagonal. Make sure you're cutting both layers on the same diagonal!
I adhere the triangles together then adhered one to the outside triangle
and one to the inside pocket.

At this point start decorating! You can stamp about the inside pocket and the left inside panel. BUT, I think it's better to stamp on a separate piece and adhere that to the left inside because of the outside pocket causes a ridge and may interfere with a good image. The inside pocket is great for a gift card or some tags.

I die cut my words on both black card stock and black foam. I used my Bearly Art Glue since it has such a very tiny tip! I made a bit of card candy to add to my card front.

I used a couple Spellbinders dies for this and my words on the cover. The very bottom petals are from Spellbinders new Alabaster card stock. It is a faint cream color and 100 lb. The flower is made from 3 colors of card stocks. And the print paper is from my stash.
You can check out my video either on my FaceBook page, Stampin Carol - Lots of Crafty Goodness, or on my YouTube channel, both dated yesterday.
Now to decorate an envelope to match as this will be my fancy fold swap
card at our monthly stamp club meeting.
Stampin Carol
Through love serve one another. Galatians 5:13

- Shapeabilities Simply Said Phrase Set Two Etched Dies

- Price: $19.99
- Sku:S4-564
- Spellbinders - Nestabilities Collection - Etched Dies - Fancy Edged Ovals
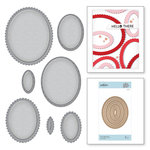
- Price: $18.99
- Sku:spe-s4-907
- Bloom Creator Die Set

- Price: $24.95
- Sku:DI-0323
- Pinkfresh Studio - Clear Photopolymer Stamps - Friendship Blooms

- Price: $22.79
- Sku:pfs-105521
- Pineapple Smoothie 8.5 x 11 Cardstock

- Price: $6.95
- Sku:CS-0026
- Kiwi Slice 8.5 x 11 Cardstock

- Price: $6.95
- Sku:CS-0016
- Lemongrass 8.5 x 11 Cardstock

- Price: $6.95
- Sku:CS-0019
- Banana Cream 8.5x11 Cardstock

- Price: $6.95
- Sku:CS-0087
- Fresh Sage 8.5x11 Cardstock

- Price: $6.95
- Sku:CS-0143
- Black Licorice Paper 8.5 x 11 Cardstock

- Price: $6.95
- Sku:CS-0003
- Tsukineko - Memento - Fade Resistant Dye Ink Pad - Tuxedo Black
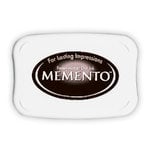
- Price: $6.43
- Sku:gb-tsmp900
- Fun Stampers Journey - Adhesives - Journey Craft Glue

- Price: $4.69
- Sku:spe-ad-0111
- Candy Minis Enamel Embellishments

- Price: $4.95
- Sku:AC-0135
- Fun Stampers Journey - Tools - Journey Scoring Board

- Price: $23.69
- Sku:spe-to-0149
- Fiskars - 9 inch Bypass Paper Trimmer

- Price: $22.42
- Sku:f-9913
- Journey Blooms Paper Trimmer

- Price: $34.95
- Sku:TO-0039
- Scotch ATG - Adhesive Applicator Gun - Pink - Uses One Fourth Inch Adhesive
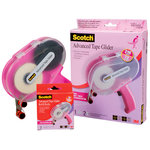
- Price: $30.20
- Sku:jv-cat085
- Spellbinders - Platinum 6 - Tool N One Bundle

- Price: $89.99
- Sku:spe-bundle-pto
No comments:
Post a Comment