Sunday, January 30, 2011

Upcoming class

Next Wednesday, February 2, I will be teaching the "Wiper" card and another at our local scrapbook store.  Here's a teaser of the 2 cards...


 I am using the store's paper and stamps so I won't elaborate on them. I'm looking forward to a good class and will post the tutorial to the "wiper" card sometime after my class on March 9th at G.V.R.

I want to thank those who gave me some ideas on the corks from a previous post.  I hope to try something with them soon!

Friday, January 28, 2011

Design Team Call

Well, I've never tried to be on a Design Team but I'll give it a shot. TAC™ has a call going out for designers and I thought, can't win if I don't try. So, without further ado, here's my submissions.


This first of 3 cards uses the Rustic Chic Wing It Collection, Hieroglyph Horses and Noble Notes stamp sets.  I did a bit of the Bandana technique on the red background, can you see the white dots? I used my White gel pen for that.  I also stamped the horse using the Crumpled Paper technique. (You can find how to do this by looking down in the left sidebar to the Resources section and click on the technique.)  I had a smudge from ink on my finger just below the horse so, rather than start over, I smudged it more and edged the stamped pieces with the ink! Don't you think it gives a kinda vintage or aged look?  I colored the white floss with a Copic marker. All images (and smudges) are stamped with Jumbo Java VersaMagic ink.


How do you like the little saddle?  It's from a pair of earrings that I got at the yard sale (same place I got the corks). I thought it'd work great with this card so it got added!


Ok, card # 2.  I started with a 6" x 6" base of black cardstock and added a 5 1/2" square of Reece SWIC. I used my Wizard and Nestie Labels 3 for the 2 pieces behind the Cowboy Boot. While the paper was still in the Nestie after embossing I sponged some L'Amore PH ink on the corners. Gives quite a framed look, don't you think? The boot is raised up using some foam mounting tape.


The boot was stamped with Momento Tuxedo Black on White Caboodle cardstock then colored with Copic Markers.  The boot's blue top just didn't photo that well but it is a little bit bluer than it shows.  I used B41, G82, R89, and T5.  Any shading was done by going over the sections with the pens numerous times. Very subtle, don't you think?


I used Reece ribbon, a safety pin,  and another piece of an earring.  The phrase comes from the Bless Your Heart Hostess level A set.  I was wanting to use eyelets on the tag but either I'm out of the color I needed or they didn't want to be found.


One of my favorite flower sets is Blossoms & Blessings. It's so versatile! Here I used it with the Uptown Girl Wing It Collection. I used a sketch by Heather Scott.  I also used my Mega Scalloped Oval punch, really adds a pit of punch! Again I used Copic markers; G12, G82, YR23, YR 24, RV25, 7 RV19.


Can you see the little dew drops of Glossy Accents on the flower and leaves? I also used it on the flower center.  And the little hearts are from the Clear & Pearl Gem Collection.  This is a great box of small goodies! They're sure fun to add some bling to your project!

And speaking of projects, we had to make something that wasn't a card.  Well, I picked up 2 cute little alarm clocks at IKEA in Phoenix, AZ a while back and got to altering one....


I used the Baby Blossoms Limited Edition set since this clock is pretty small, only 3 1/2" tall. Again, the images are colored with Copic markers but I forgot which ones I used.

So, keep your fingers crossed for me as I submit this post to The Angel Company!!

Wednesday, January 26, 2011

Playing with Copic Markers and more...

As promised I'm going to show you the 2 things we did st the Copic class.  I did not finish the "coloring" sheet as I still don't have a large enough (got 80!) selection of "hair" colors of markers.


Jenny, a Copic-employed teacher, had this practice sheet made specifically for her.  I still have 4 more little gals to color when I get more markers.  She just laughed when she seen my ghoul and goblin girls and showed my page to the class.  I colored these gals like I did in honor of Barb's Haunted Design House characters.  I don't do spooky but can do kinda cute.  The nice thing about this sheet as it gives spaces to write the Copic marker colors so you know what you used.  I'm still working on the "feathering" technique but more practice will definitely help.


We also played with air compressors and air brushing.  What a cool look!  And I had to add more bling!


How do you like my flower?  The lace was colored by putting some alcohol into a jar, adding a couple drops of Copic marker refill, than dropping in the lace and shaking.  The lace is adhered with Copic tape but I didn't like the shine of the tape in the holes of the lace so I added little pearls in the bigger holes.  You can barely see them but they're there!  And I used the I*Rock tool to add blue metallic crystals to the flourishes and more pearls to the flower petals.  I think any more is over-kill.

We had a challenge over on TAC's Paper Crafting community of doing One Layer only (not counting embellishements). Sometimes I find it easy and other times, not.  There are so many great cards done that I had to work pretty hard to come up with something different, to my way of thinking...


I used a light tan cardstock, Hiero Horses, Happy Trails, and Joyful Notes.  And I used only 1 ink, Burnt Umber PH!  Can you figure out how I did this??


Here's a closer view of the horse.  I do have a "tutorial" on this, just look down the sidebar a bit to resources and find the Crumpled Paper Technique.

Monday, January 24, 2011

All worn out...

I was playing with a technique from the Technique Junkies newsletter for a 1 on 1 swap I do every month.  This is called Worn Wallpaper.  I used some scrap designer paper from another company to do the technique on and I ended up having to white emboss as the Brilliance Moonlight White ink just wasn't showing up enough.  Well, what do you think....


I used the Blossoms and Blessings flower, my Wizard, Nesties Labels 3, Momento Tuxedo Black ink, and copic markers.  I coordinated the marker colors with the designer paper and light green.


Here's a closeup of the flower. Not bad.  I love the blending abilities of the Copic markers.


I found some "celery" colored ribbon that TAC™ used to carry, a burgundy button and a little flower from the Clear & Pearl Gem CollectionGlue Dots are wonderful on these gems and buttons.

Last Monday I took a Copic marker class at the local scrapbooking store with Jennie Black and it was a ball!  I will post my fun attempts at coloring hair and skin shortly.  I need to finish out the sheet (and I "need" more markers) as, even with a 3 hour class, I didn't get done.  We also made a little denim bag which is also not finished yet either.  I want to add more bling to it. So, stay tuned and you'll see these soon!

Last Wednesday I had a Valentine card class at the scrapbooking store and had 9 students!  We had a ball!   I'm currently working on my samples for my 2 February classes, one of which will be the Wiper card that I posted in the Blog Tour last Sunday.  I will post them here, too, but remember, I MUST use product from the store when possible.

And I must share this with you...  Last Friday I went to an estate sale and found this:


I need some ideas!  Please share with me what you would do with all these little corks.  They're 7/8" long and about 3/8" diameter.  I haven't counted how many but must be over 50 anyway.

Saturday, January 22, 2011

This one is Just For You!

Over on Paper Wings we have LOTS of samples listed by category and stamp name.   This is a great place to go if you have a brain burp and need inspiration for a particular stamp set.  I've uploaded a LOT of cards over the years and so enjoy the gallery.  You can also see the results of challenges like SK47 (sketch 47- 47th challenge with a particular layout). This card is my attempt at this challenge...


I'm using Mimi SWIC (replaced by More Mimi) and an image from Delicate Florals.  I colored the flower with Copic markers.  The text on the tag is from the Bless Your Heart Hostess Level A set. And isn't the Lime Scrapper's floss cool! It matched wonderfully! I think this color is being discontinued by the manufacturer, Karen Foster Designs.  But they are coming out with some NEW cool floss called Scrappers Spool.  I'll have to get my hands on some with I use up what I have....


I did not have the color green marker that I wanted so I combined 2 colors and I love the result! I used: YG06 & Y06 for the leaves, RV29 for the flower, Y06 for the flower center, and E29 for the branch.  Can you see the Stardust Clear Gel pen used in the flower center? You KNOW how much I like that pen! I also used 2 punches: the Giga Scalloped Circle and the 3" circle.


Thursday, January 20, 2011

Hey , Chick!

Each month our stamp group, the Ink Spots, meet to exchange ideas, etc.  I hope to download my phone photos of a recent challenge that turned out great.  This past meeting our ATC theme was a "new beginning".  Well, I stewed and stewed over this and had a total brain freeze.  I finally came up with the following the day of the meeting.


My thought was that a chick was the beginning of a chicken and I haven't used this set much.  It's called Tail Feathers and has some real fun little chickies!


The words in the background came from the Background Soup set. It's a great set with an assortment of cool images.  I colored this little chickie with Copic markers and added the little flower that I colored with Pearl Ex.  There was a wide variety of ATCs. Kathy's ATC was the most unique to me as she used an image and stamped the word NOW in it. What a hoot! I liked all the ATCs and I'm getting into them more and more.

Tuesday, January 18, 2011

Just don't know about this card...

I was kinda following a sketch design somewhere and I just don't know.  I don't really like this card but what do you think?


The paper is Amelia, a retired product and I've just about used it all up.  I used the stamp set, Inspirational Sayings, and this particular text fit nicely on the tag. The eyelet is from one of the many packs that came in my Crop-a-Dile case and set with the 'Dile.  I "found" my twill ribbon way back in a drawer, fun when you find something you forgot you had!


Here's a close-up of the tag.  Not bad. I have foam mounting tape under it to raise it off the card.

So, what do you think??  I just don't know....

PS. By the wonderful comments I can only say that I'm my own worse critic....  Thanks All!

Sunday, January 16, 2011

Blog Hoppin' Time!

Again, us "angels" over on Paper Wings are hoppin'!!  I sure enjoy these and love to see what they come up with in their creativity and imagination!

Our theme this time is all about Valentines, love, etc!  I have so few "current" stamps but am thankful that I have Hedgehog Happiness, a Hostess C set, from Seminar last June. And this is a "windshield wiper" card, a unique design that I will be teaching at Green Valley Recreation March 9 and possibly at the local  scrapbooking store sometime in the future.  Are you ready?

 
Here is the card closed. I used my Wizard, Nestie Labels 5, and Amberly Grace SWICmatching card stock, and ribbon.  I colored this cute little guy with Copic markers and will list them shortly.


Here's the open version.  I think I need to stamp the far left panel but haven't decided what to stamp on it! I also used Amberly Grace hardware on the side panel but didn't get the eyelets centered.  The ribbon was off center and I didn't notice when I used my Crop-A-Dile to punch the eyelet holes.  The 2 hearts on the wiper were made using a Sizzix die and I hand-wrote on the smaller heart.


Now, how do you like this little guy??  After coloring the hair I used the Blender refill on a small piece of terry cloth and dabbed it on him.  Gave quite the texture.  My hubby had to feel this as he thought it had real texture.  Faked him out!  LOL!


I used some sequins from the Clear & Pearl Gem Collection and little blue metallic crystals and the I*Rock tool to finish the wheels.  And I added a bit of "shine" on the hearts with the White Gel pen.  Just too cool!
Now, for the Copic markers....    I used E55, E57, E74, BG15, BG72, RV21, and R81.

I surely appreciate comments and ratings so please let me know what you think of my card before going on to visit the following angels.  Thanks!!

Rita W.
Angela K.
Michelle
Shirley H.
Julie R.

Chelsea C.


Saturday, January 15, 2011

Your world...

I'm not going to be corny today as I show you my next card.  I just got an order in and one of the stamp sets I ordered was Joy, Found.  It's so cool but I really like the cattails in the set (but the rest of the images are really cool, too). I was following a sketch challenge by Heather, who is uber talented. So, without further ado...


I used Amberly Grace SWIC and matching cardstock for the card.  I stamped the cattails in Oasis Green VersaMagic ink and the text in Noir PH.  I used the Corner Chomper 1/4" cut on the cattails piece. It's such a cool tool and with the 2 different sizes of corners, it's fabulous! And it cuts text-weight paper to chipboard!


Isn't this little frog adorable? I colored him with Copic markers.   Tomorrow evening I'm in another Blog Tour so watch for some great Valentine ideas!

Check out other's cards using this sketch....


Thursday, January 13, 2011

Owl only have eyes for you...

How corny is my title?  Pretty sad but I bet it either brought a smile, made you giggle, or you slapped your forehead in amazement of the corniness.  But anyway, have you signed up for my blogoversary candy??  I'm not getting very many comnments so the odds are pretty good for you to win.

So, on to my card.  I realized that I had a virgin stamp set! Oh my gosh!  A set that's not seen the ink of day! (Time to slap your forehead again.) This cute little set is a Hostess level A set, yours free with a qualifying order of $30 (before tax and shipping). The paper is retired Amelia (which I'm trying to use up).


Isn't this little guy just so cute!!  I colored him and the ribbon with Copic markers.


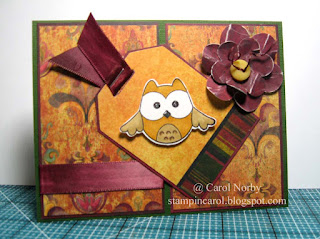
Here's a closeup of the little guy and my flower.  I punched 2 sizes of flowers, the Extra Jumbo and the Super Jumbo flower punches, scrunched the paper, opened  then sanded for a distressed look. I added the button and Copic-colored white scrappers floss (discontinued by manufacturer).  If you look into the owl's eyes you will see a little glimmer from a black glitter pen.  I just had to give him a little sparkle.


Monday, January 10, 2011

Best of Friends...

I really enjoy playing with sketch challenges as they really jump-start my mojo and I need ALL the help I can get!  This design was a challenge on Paper Wings last week and it was so easy yet a great design!


This cute little gal is from a Limited Edition set called Lil' Cuties, which is no longer available.  It is a miniature version of One of A Kind Hostess A set. The paper is Tutti Frutti SWIC along with some navy cardstock for layering.


Since the image is rather small I didn't do much blending or shading.   The phrase at the bottom was cut from one of the sheets of the paper pack and I think it is perfect as part of the design.

So, have you been stamping lately???

Saturday, January 8, 2011

I thought of you today....

The other day while on FaceBook I seen a cool card on one of the sites I follow.  It had to do with scallops. Well, that set me off!  This card is 5 1/2" square. Sometimes it's fun to make a "non-traditional" size!


I used a lot of scraps of card stock, my Giga Scallop square punch, and 2 stamp sets, Graphic Blooms and Thought of You "purchase with purchase" set. I used the "Rock & Roll" technique using Sunflower and Prussian Blue PH inks.


Here's a close up of one of the flowers. The blue almost turned green but that's ok since I used green card stock.  I need to sharpen my scallop punch as it's not punching clean anymore. So, to hide the roughness I used my sanding block on the DCWV white core cardstock.


I decorated the inside of the card using the same elements as the outside. I have a huge stack of envelopes so I'm sure I'll find one that'll fit this card. It will cost more to mail but I'm sure this card will bring a smile to whomever I send it to. 


Friday, January 7, 2011

From the Heart Blog Tour


Can you believe it!!  I almost missed this!  I've been bustin' my buns trying to come up with a cool card and, by golly, I think I dood it!!! I have so few "Valentine" images that this was a difficult card.  I wasn't about to use the one I made for next week's Paper Wings Blog Tour so....    Anyway!


What do you think??  I used Mimi (replaced) and More Mimi SWIC and ribbon.  I stamped the branch from the Sprigs set in Momento Tuxedo black then colored the hearts with Copic marker R85. I used a PrismaColor pencil and OMs (odorless mineral spirits) on the stems.  I used my Super Jumbo & Mega Scalloped Oval punches, the Corner Chomper, and my Crop-a-Dile for corners, eyelets, etc.


I found these little "loops" in my stash.  They're similar to these and may even be them but mine were not in the proper package to be sure but the similarity is definitely there.  The phrase is from the Love You Hostess level B set.


I used my Stardust Clear Gel pen on the center panel hearts.  What, were you worried I didn't??  You KNOW it's my favorite bling maker!

Here's more cool angel projects for this tour: